PVC Conduit Laptop Stand
On Monday 11th of June 2012 I was at the WWDC Keynote to see the Retina MacBook Pro announced and I felt pretty satisfied knowing my cunning plan had worked. Months ago, rather than ask for the laptop I wanted at work I settled for a maxed-out Mac mini, expecting the team to grow, and with that growth there would be a need for a machine to do continuous integration. That machine would be the Mac mini, with me in obvious need of the anticipated 2012 machine free of optical drive, with Ivy Bridge, etc. etc.
So I was all set to say thanks, I’ll have the new shiny and a 30” monitor too please – I’ve been using two Thunderbolt 27” displays and I find that side-by-side they are just too wide for comfort – but that 30” wouldn’t have been a retina display. Better to live with just the laptop for a little while, getting the monitor when retina displays become available or other choices present themselves. Current displays do look pretty ugly next to the retina MacBook Pro, no matter how good they look up until the time you see one. And living with one smaller screen would have the beneficial effect of encouraging me to get more efficient with my use of Mission Control and gestures.
In the meantime I would need a laptop stand. I looked around a bit, didn’t feel like spending $70 on a bent aluminium thing, and while searching came across the AIAIAI Laptop Pipe Stand. Couldn’t find any reasons not to just build one…
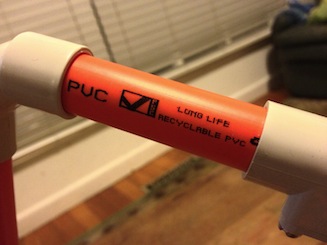
The thing is as you see it, about an hour’s work cutting 20mm conduit and inserting it into fittings. Luckily the mitre saw still had its aluminium/plastic blade installed so no time wasted changing it. I used bulky inspection T-pieces because there weren’t any regular T-pieces on the shelf at Bunning’s – they’re always out of something you need.
I want a sloping stand so gravity can help the machine stay in place. PVC conduit fittings do come in 45° angles but Bunning’s don’t stock them. Chopping one of the large radius joins to get around a 30° angle was my first thought but the outside diameter of the fitting isn’t the same as 20mm conduit so there would be no joining to that piece once cut. So I needed to bend some PVC – first time but it turned out to be easy. The bends are made identically using a form made from two wooden blocks clamped to a flat board, forming an angle for a softened conduit to rest against. A heat gun got the PVC soft and then it was just a careful, rotating bend and a couple of minutes to let it cool and set in position. Unless the angle is the same on both pieces the front of the stand won’t be square.
One wrinkle is that the 90° elbow pieces are not actually 90° bends, more like 85°! I expect electricians just use the natural flex of the conduit to place everything square as they go. I used a heat gun to soften the elbows and a carpenter’s square to get them set at the right angle. If this wasn’t done the result would be a stand that doesn’t look right or sit flat on the table.
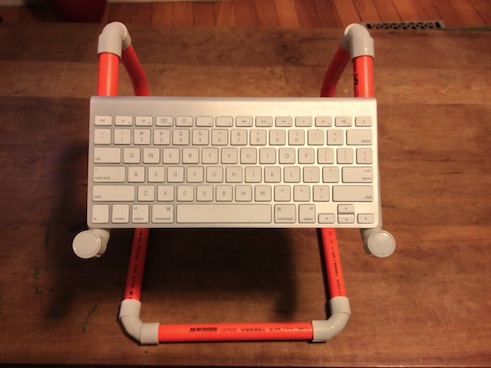
Finally everything got a little clear PVC adhesive before being set in place and checked for square. I like the result and at a cost of well under $20 I can do it again if it needs to be a little bit different. It is sized for an 11” MacBook Air and it should support anything up to a 17” comfortably. It is too wide for an iPad – the keyboard shown is a useful size reference since the MBP isn’t here for modelling yet.
Searching before the build I found that a few people have done things like this over the years, no doubt AIAIAI got the inspiration from them and I’m just completing the circle. I did not choose to do any “cable management” because these machines just don’t have enough cables to worry about. I might cable tie the MagSafe cable to a pipe somewhere near where it connects to the machine but that’s all.
2019 update: Years later I left this with Ida, a great colleague from IBM based in Singapore. I had taken it with me while there for a few weeks and after shopping my case was full. Now I need to make another one.