Amiga 1200 Keyboard, part 7
Salvaging the parts
Building rev 2 means a whole new PCB. Rev 1 is no good any more but there are $50+ worth of parts on the board and they need to be reused. Desoldering used to be hard but now is not much of a challenge...
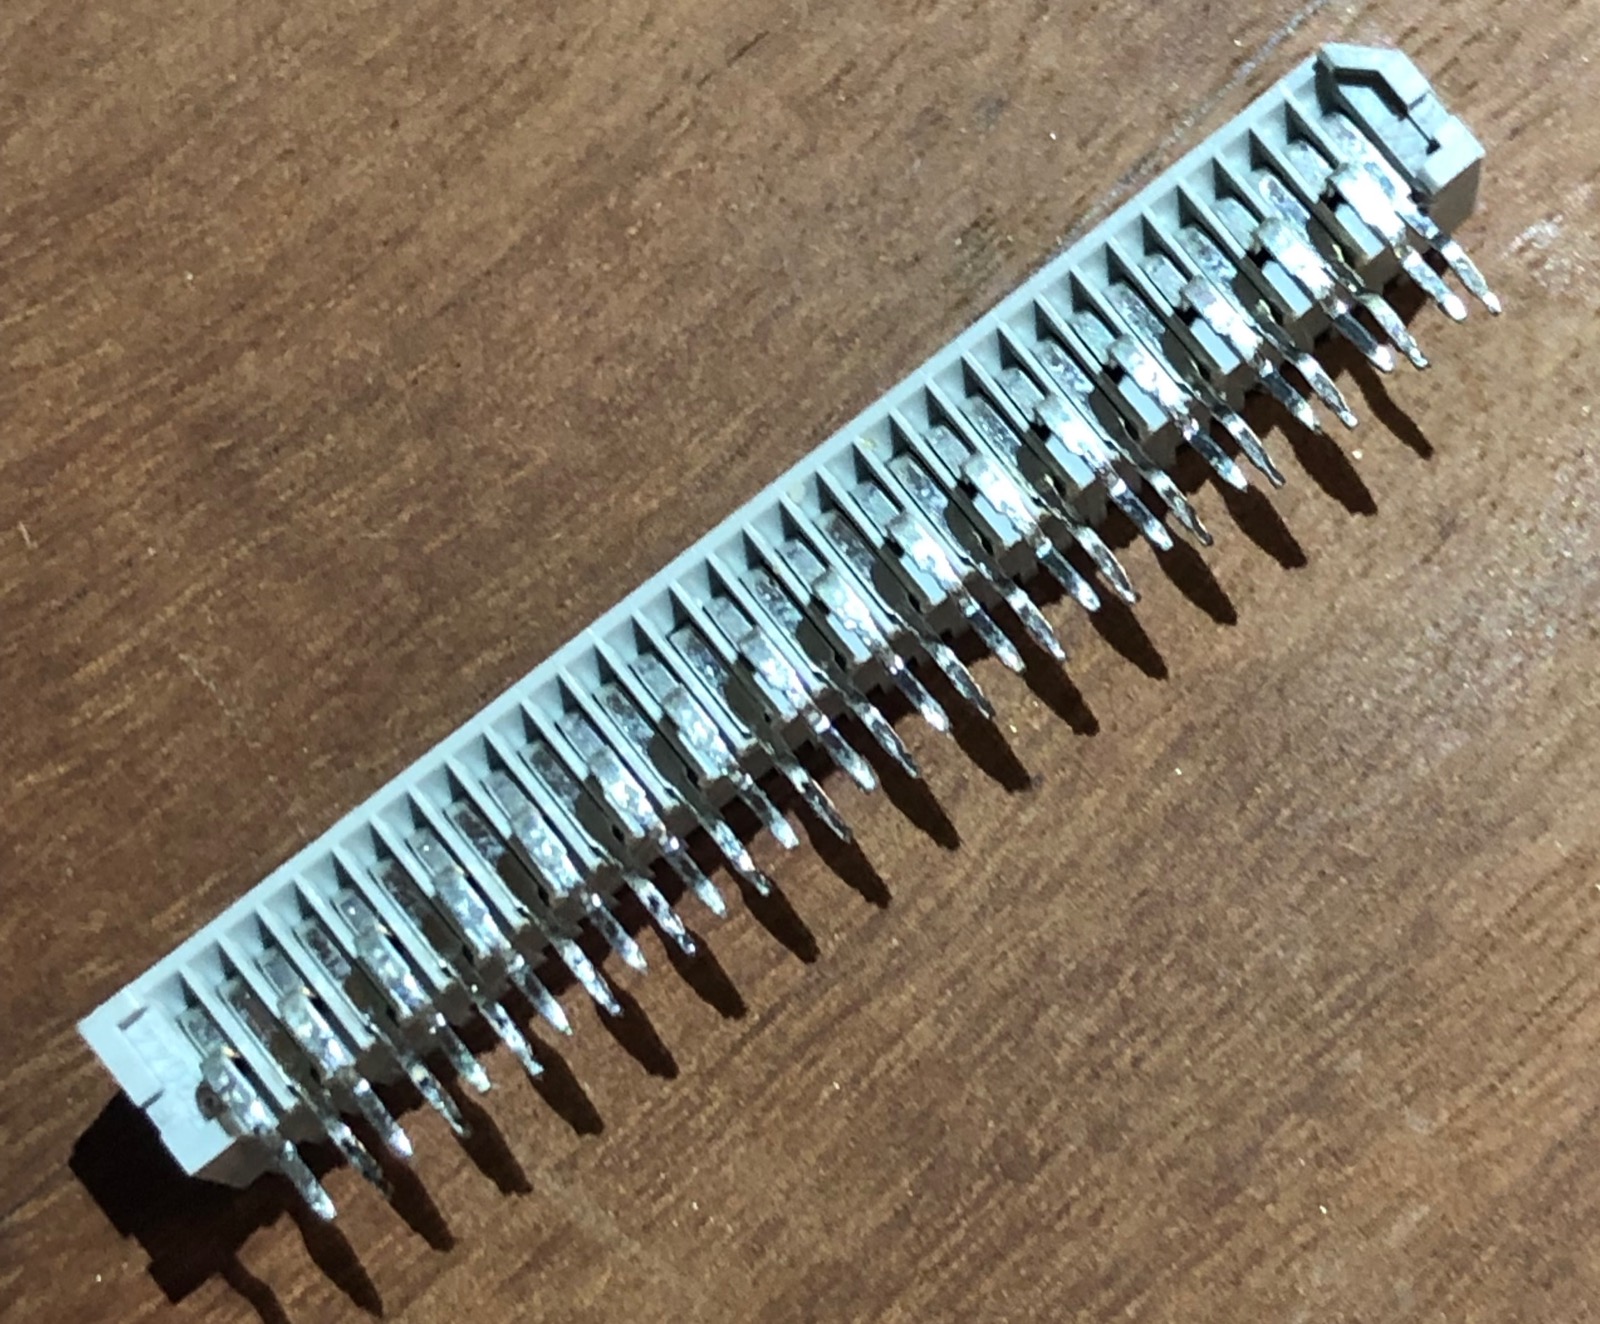
This is the FFC connector that joins the keyboard to the Amiga. You could possibly remove this from a board with basic soldering methods but it would very likely not be as neat or as easy as with my new desoldering tool.
Melt and pull
Level 0 desoldering. This works where things have one or two leads only. You melt the joint(s) with your iron then pull the part out. Burned fingers are likely. Not to be confused with more sophisticated melt and pull methods like hot air or infrared.
Solder wick
Level 1 desoldering. A copper braid is placed on the joint to be desoldered and then heated. The heat travels through the copper braid and it soaks up the molten solder using capillary action. Some braid is pre-fluxed and this tends to work better, solder flows better with flux. If your braid isn't pre-fluxed try applying some to it - buy a flux pen to start with - and see the difference. This method is likely to succeed where there is plenty of room around the joint and where there is a high tolerance to heat. Delicate glass-bodied diodes or vintage ceramic caps may suffer from the higher heat of this method.
Solder pump
Level 2 desoldering. There are pumps and there are pumps. The best manual pump I know of is the mighty SOLDAPULLT - at the price why would you buy anything else? It has about four times the volume of the rubbish pumps a lot of hobbyist stores sell so it can actually move the solder. It has a tip that doesn't melt and if you do damage a tip it stands up to re-trimming with a sharp knife well - or you can just buy a replacement.
These things do require maintenance to remain effective. Silicon grease keeps the air piston moving air, while regularly emptying out the sucked solder keeps it from getting blocked up. I have had mine for at least 20 years and I am still using the first tip - obviously not a heavy user, but heavy enough. There is really a lot of complete garbage sold pretending to have the ability to pump solder and not a lot of it does - the Chinese aluminium things are a great example. There's al alternative available from Engineer tools - this may be OK, I have never had an Engineer brand tool that wasn't reasonably good. However I will trust the soldapullt. I could have stripped the entire board with the soldapullt but it would have taken a bit longer.
Solder vacuum
Level 3 desoldering. As with manual pumps there are levels of quality! And I though one day I might aspire to owning a Hakko - but with the price of the ZD-985 desoldering station I decided to follow sensible tool advice:
"investigate the cheapest tool you can. If you use it enough that you need more than that buy the best"
Here's Dave from EEVBLOG having way too much fun with the ZD-985.
I think I paid $138 delivered and mine worked out of the box, unlike Dave's! He finds it has some problems but is obviously enjoying himself when he gets started. BTW that solder sucker he shows at 1:48 is a great example of the kind of pump that doesn't work.
I found this worked GREAT! Until it didn't. My fault though. Regular maintenance is as important here as it is with the manual solder pump but technique is maybe as important. When I started using the pump I soon found it blocked up in the nozzle with solid solder gathering just short of the collection chamber. Repeated poking with the supplied cleaning stick got rid of that but why was it there?
Dave shows that the technique is to put the tip of the vacuum over the joint and as soon as it melts to use the tip to wiggle the component lead around while applying suction with the trigger. This allows air to flow all around the lead and hopefully all of the solder will be vacuumed away leaving the lead free. What I was doing wrong was letting go of the trigger too early. If you keep the vacuum going while pulling the tip away from the board this allows a large amount of air to chase the melted solder up into the collection chamber, keeping it from settling in the tube and blocking everything up. Before doing it properly I blocked up the gun with just a quarter of the keyswitches. After figuring out the technique I finished the rest of the board with no more blockages and took a very satisfying button-sized lump of collected solder out of the collection chamber at the end. All the components came out easily, even the 32-pin connector pictured at the top of this post.
Level 4 and beyond...
Beyond me that is. Hot air rework stations. Heating pads. Infra-red. Maybe if I win a lottery and have time to go and learn to use them properly.
rev 2
The rev 2 PCB is back in a couple of days so it won't be long. I've been thinking about keycaps and populating all the weird Amiga keys - it's pretty easy to get blank keycaps in any size and laser engraving machines are under $100. That could work...