Amiga 1200 Keyboard, part 8
New PCB
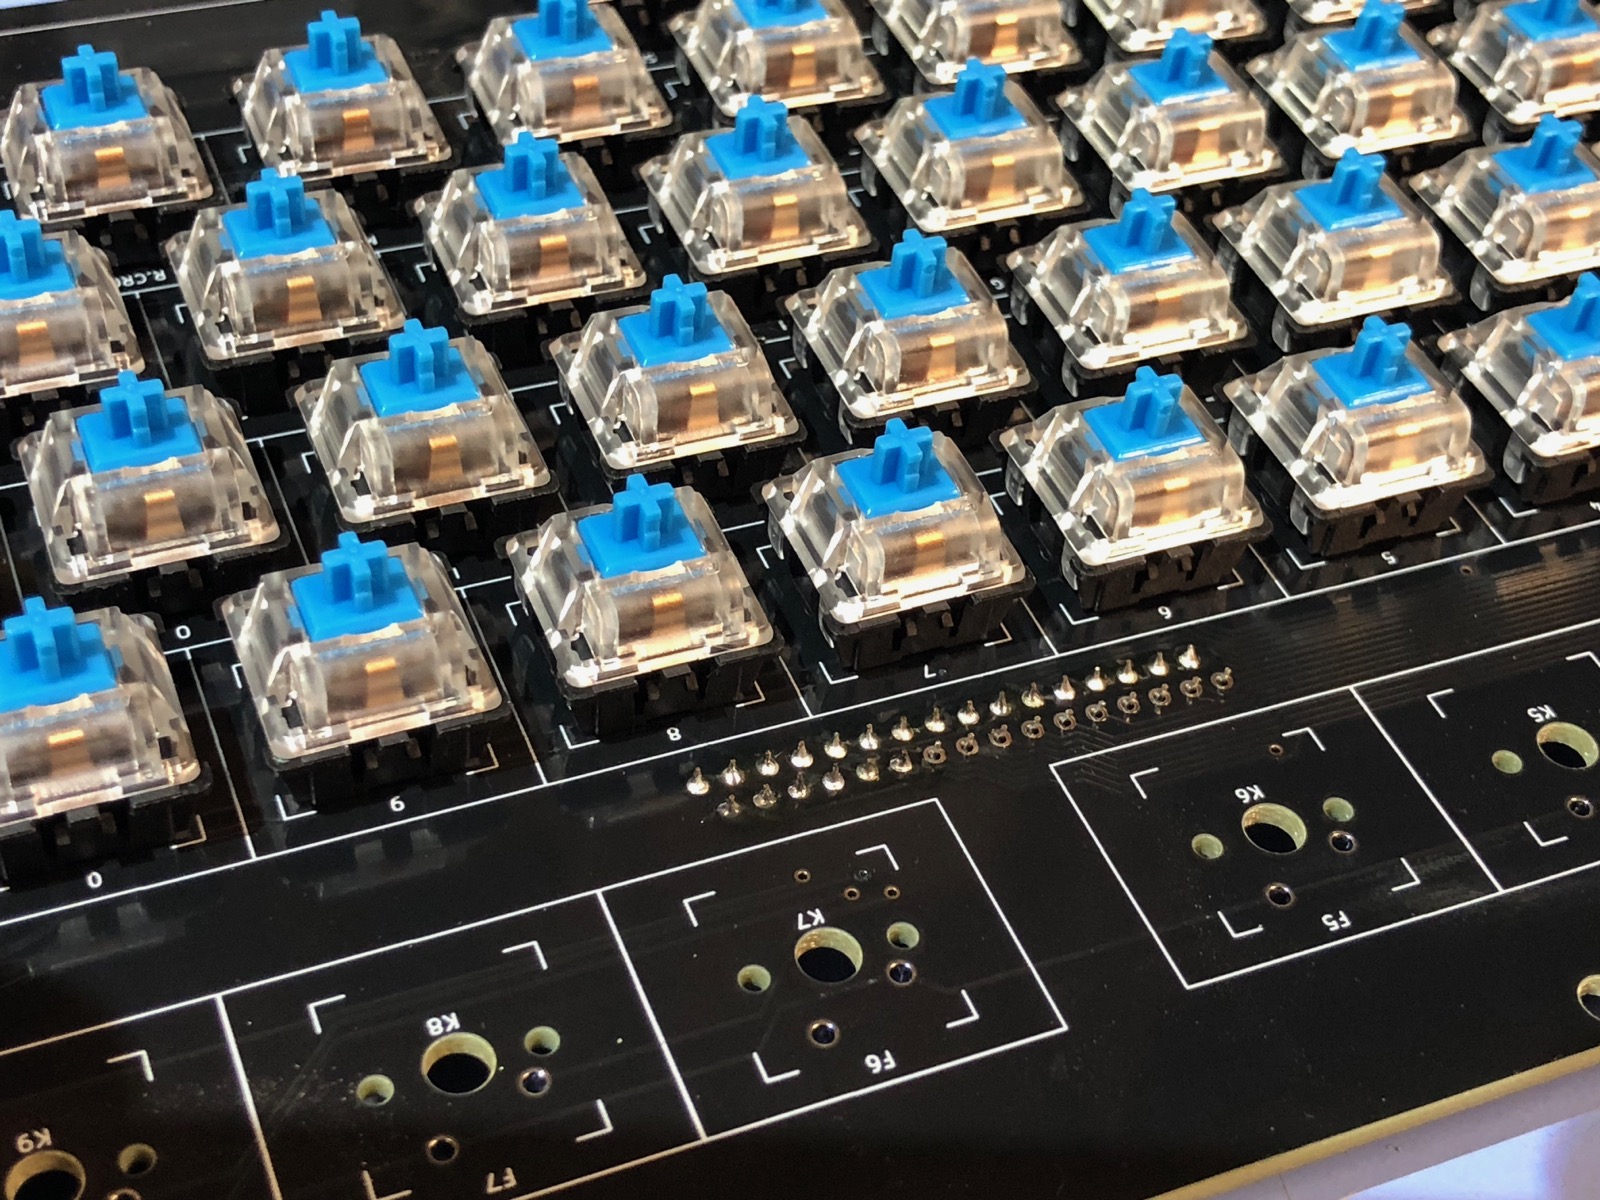
The new board came back as expected, again with fantastic service from Our PCB. Mark checked my design thoroughly and detected a piece of copper that would have shorted out a few keys in the design - he deleted it for me before forwarding the job for manufacturing. I can't stress how good these guys are for a hobbyist in Australia!
Soldering it up
No surprises here. The keyswitches all mounted in the holes they were supposed to go in, one LED in the CapsLock key, and the FFC connector in its place. Soldering was easy. And as soon as the soldering was done I plugged it in to DiagROM and everything tested perfectly. This is a board with no cuts or extra wires!
Mounting rails and stiffness
Once again I used some aluminium angle thick enough to turn into a compound set of angles with a router blade, as previous angles. This time however the PCB has mounting holes designed in. To fit the rails I used a spring-loaded punch to mark the location of required holes, then drilled the holes and used a M3 tap to make a threaded hole ready for a M3 screw. The rails then attached to the PCB with two screws per side and the keyboard sits exactly where it is supposed to be.
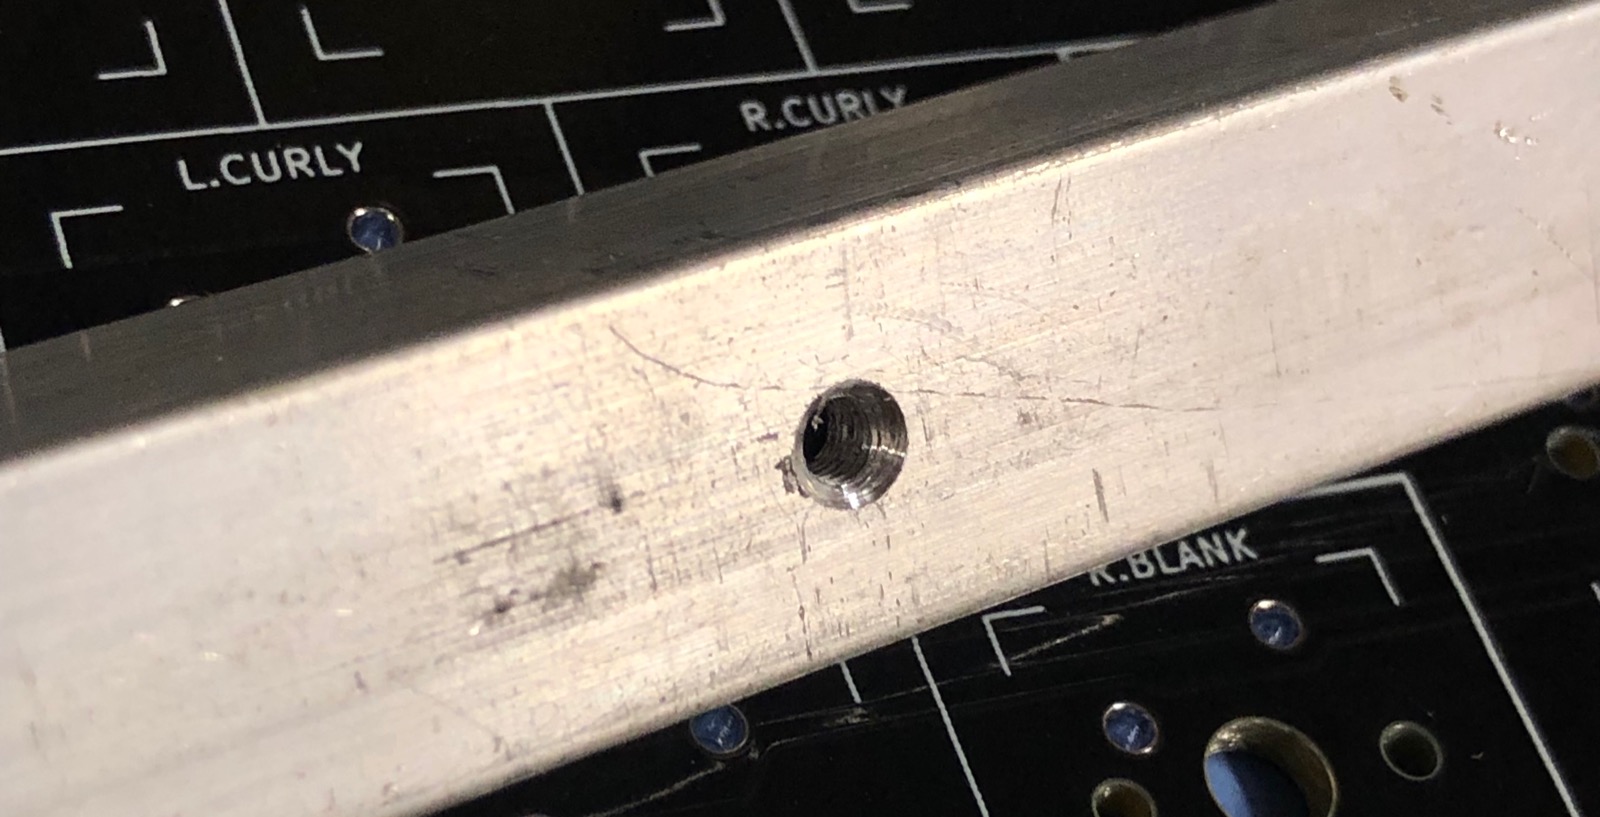
At the bottom of the keyboard is space for another piece of aluminium that engages with the bottom of the case and sets the position of the keyboard vertically. This is a thin piece, so instead of cutting threads I just made holes and put nuts on the other side. At the top of the keyboard there is a rail made of aluminium angle. Its purpose is just to make the keyboard feel stiff. 2mm is a thick board, but in the centre it does move when a key is pressed - but with the rail in place fastened firmly to the top of the PCB it is nice and stiff, fels as good as any keyboard I have.
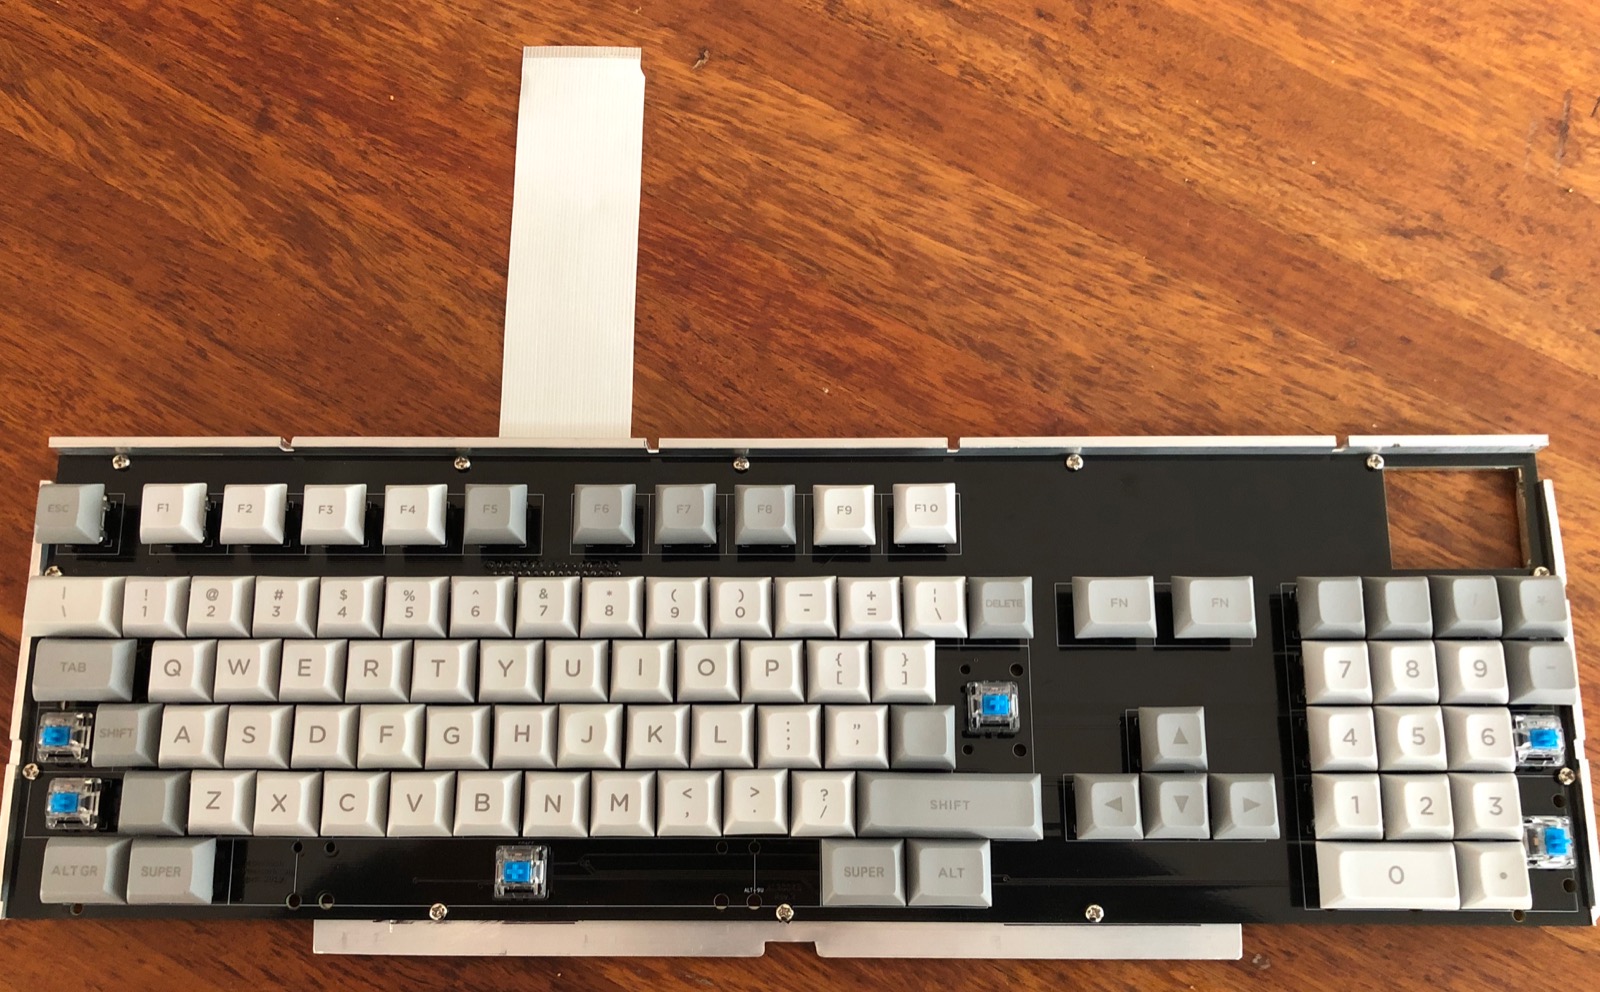
Keycaps
When you look at the A1200 there are a few gaps, it's like a grin with teeth missing. I think the way to fix this is to buy blank keycaps and to buy a laser engraver. It should be possible by experimenting with laser power and drawing speed to produce a full set of Amiga keys just like the originals. And that's the next project. But first, time to boot some Infocom adventures and maybe some 68000 assembly programming with my new keyboard :D

And that's it!
The Amiga is now fitted with the mechanical keyboard, 4GB solid state disk module, 3.1.4 ROMs. But I still need: - optical mouse - joystick (have a basic one, but I need to build up the ultimate Sanwa I have been collecting parts for) - monitor solution (waiting for my OSSC to arrive, or one day Indivision AGA Mk 2?) - better way to transfer data (Amiga Explorer is slow with the native serial port...) - figure out WHDLoad and get all my favorites like Dungeon Master and FA/18 Interceptor working again.