Amiga 1200 Internal power supply
I just don't like cables
Lots of people have updated their Amiga power brick with newer power supply modules because the older bricks are suffering from elderly capacitors, and power supplies like the Mean Well RPT-60B are an ideal replacement. They give you more power capacity than the original and they are more convenient (and probably cheaper) than replacing capacitors or diagnosing the fault in an older power supply.
Internalizing it
I also used one of these supplies in my Commodore power brick - worked fine, and it stopped some graphics corruption and crashes I was seeing due to the supply failing. When I got the unit I was surprised to see that it fit really well in the space under the floppy drive in an Amiga 1200... got me thinking!
I never use the floppy. If I need one in future I will use an external one to behave as DF0: - it's not hard to find the disk select line at the 23-pin connector and instead connect that to the disk-select line on the internal floppy header.
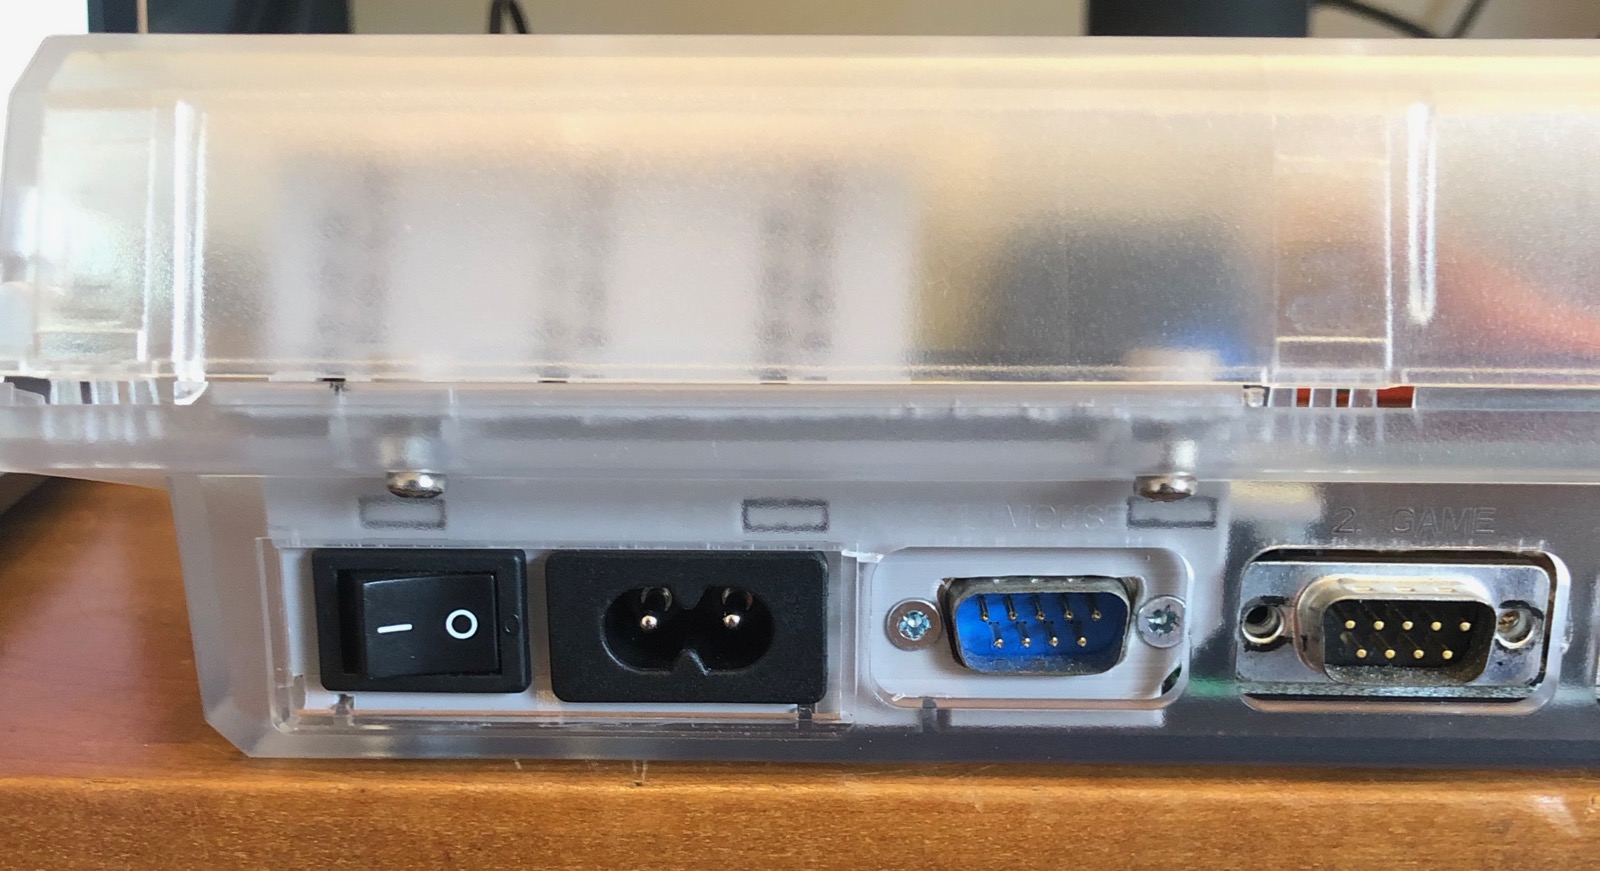
Turns out I didn't mount it exactly in that space but I did lose the floppy. Using the 3D printer I made a new assembly to house the IEC C8 AC inlet, the power switch, and the mouse DB9 socket. The power supply is mounted on a plate that fits into slots at the back of this unit and is held down at the front with some M3 bolts. A cover protects the mains voltage section of the power supply. The entire unit mounts into the A1200 case using the holes that the floppy drive used to use.
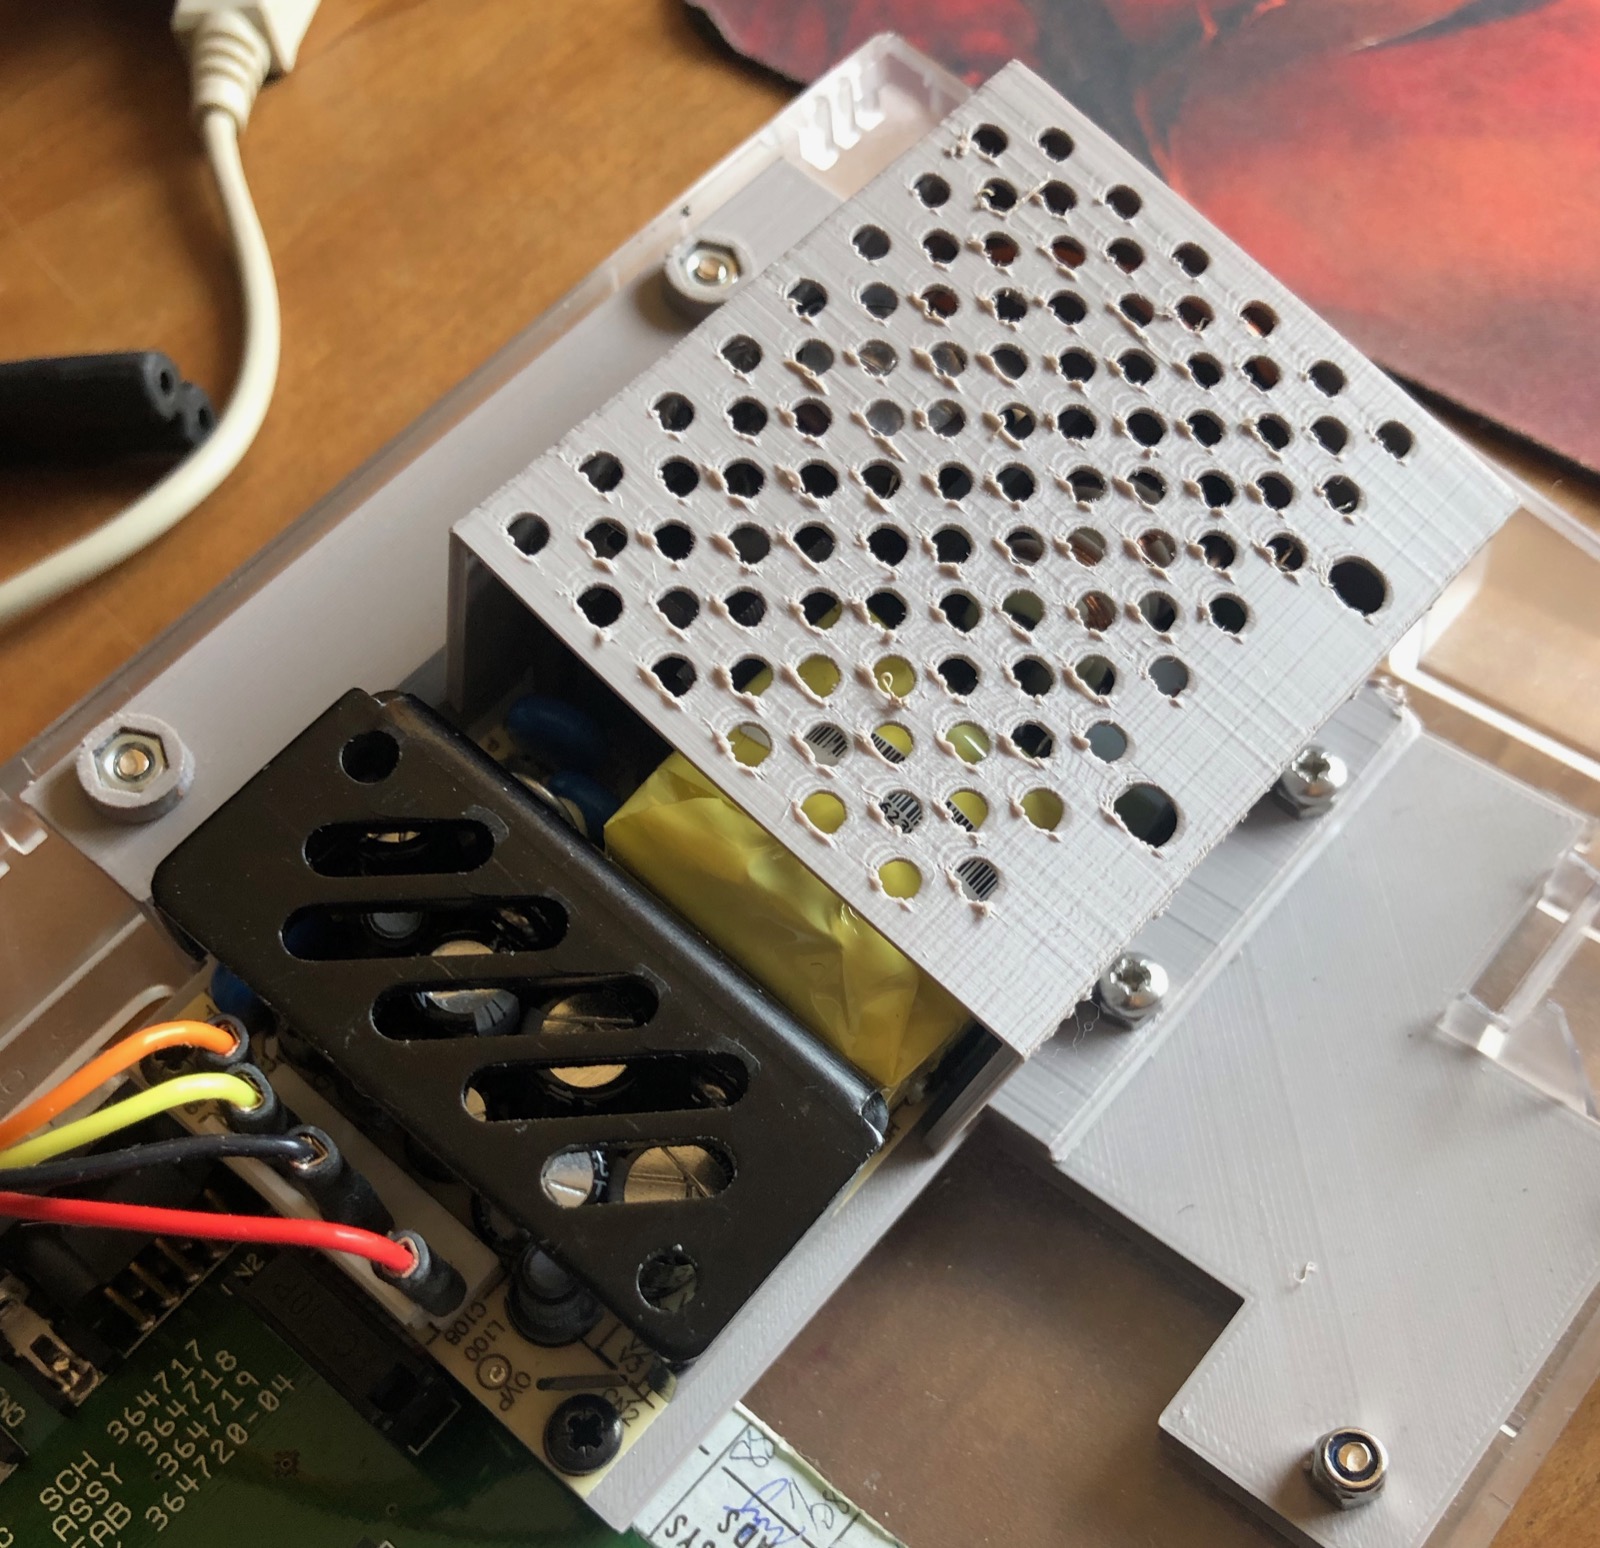
The 3D printer didn't do the best job last night. Part of the reason for making the power supply assembly in three printed parts was to avoid bridging, supports and other extruded plastic hassles. Usually the Prusa does better than this though. I will probably revise to make it more printable by using some supports, thickening in places and make it a little nicer but structurally this is fine.
Inside the machine I removed the original power connector and for good measure the rusty old RF modulator. Power cables come from the left side of the case to the power supply.
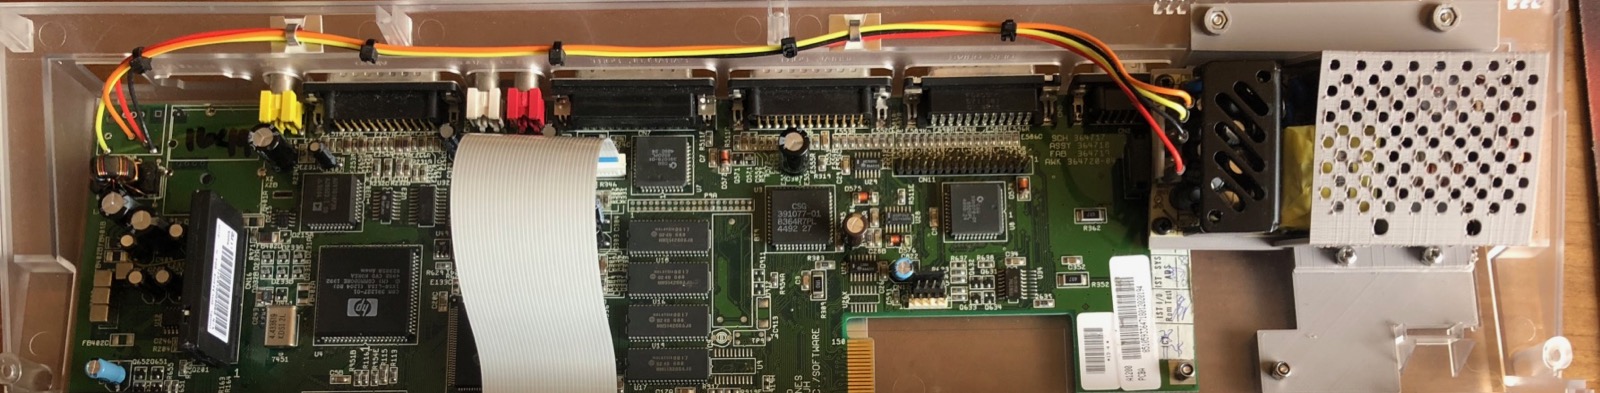
And that's all there is to it. The power cable enters the machine at the back right and it's easy to reach the power switch, no more bending down to the floor.
(The case screws aren't in - it does close completely with about 1mm to spare)
I'll be checking this out as I go using a Maxim/Dallas Thermochron button, a compact temperature logger that can fit inside the case and record temperature over time as the machine is used. I don't anticipate any problems as the ventilation here is probably better than in the brick and this is a very efficient supply, I never noticed the brick even getting warm.
Of course, don't do anything like this unless you are competent and understand the risks. Making connections incorrectly or being careless could destroy your Amiga or even kill you.