Minipulse Metal Detector, part 2
Done
In a rare example of finishing a project that started some time ago, the metal detector is done. I started in 2016 and it was always going to be ready for the next camping trip. After becoming more comfortable with the 3D printer now it is.
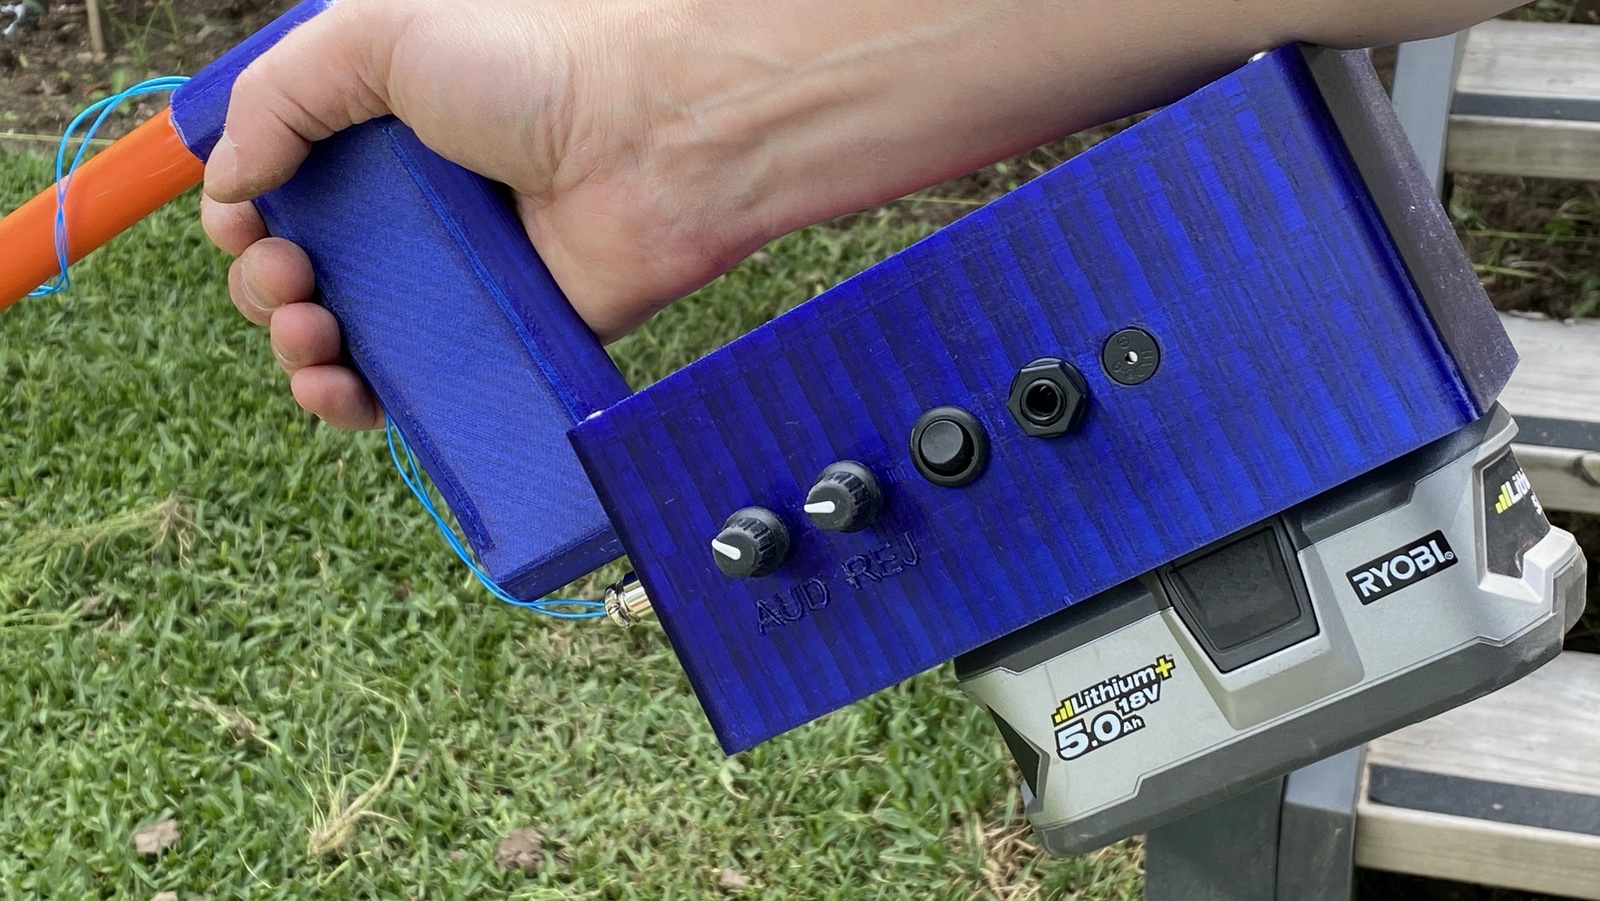
Powering such a thing is always a bit tricky and when the device needs 12V it's even harder. That's eight 1.5V batteries, a lot to manage. Or you could use the rechargeable 16850 Lithium ion cells, they are not expensive but you do need to buy a charger for them and some way to hold the cells in the device. A lot of people have done this and it's a good solution. However I decided to use the battery packs I already had for my drill/line-cutter/hedge trimmer, the Ryobi 18V system. These were the cheapest of all since they are just sitting in the garden shed most of the time. They're also big enough that two packs is going to be beyond the enthusiasm of even the most tireless kid to exhaust in a weekend. I think a module to convert the nominal 18V from the pack to 12V cost $2.80 or something on eBay. This does weigh more than the 16850 solution but I don't find it too heavy.
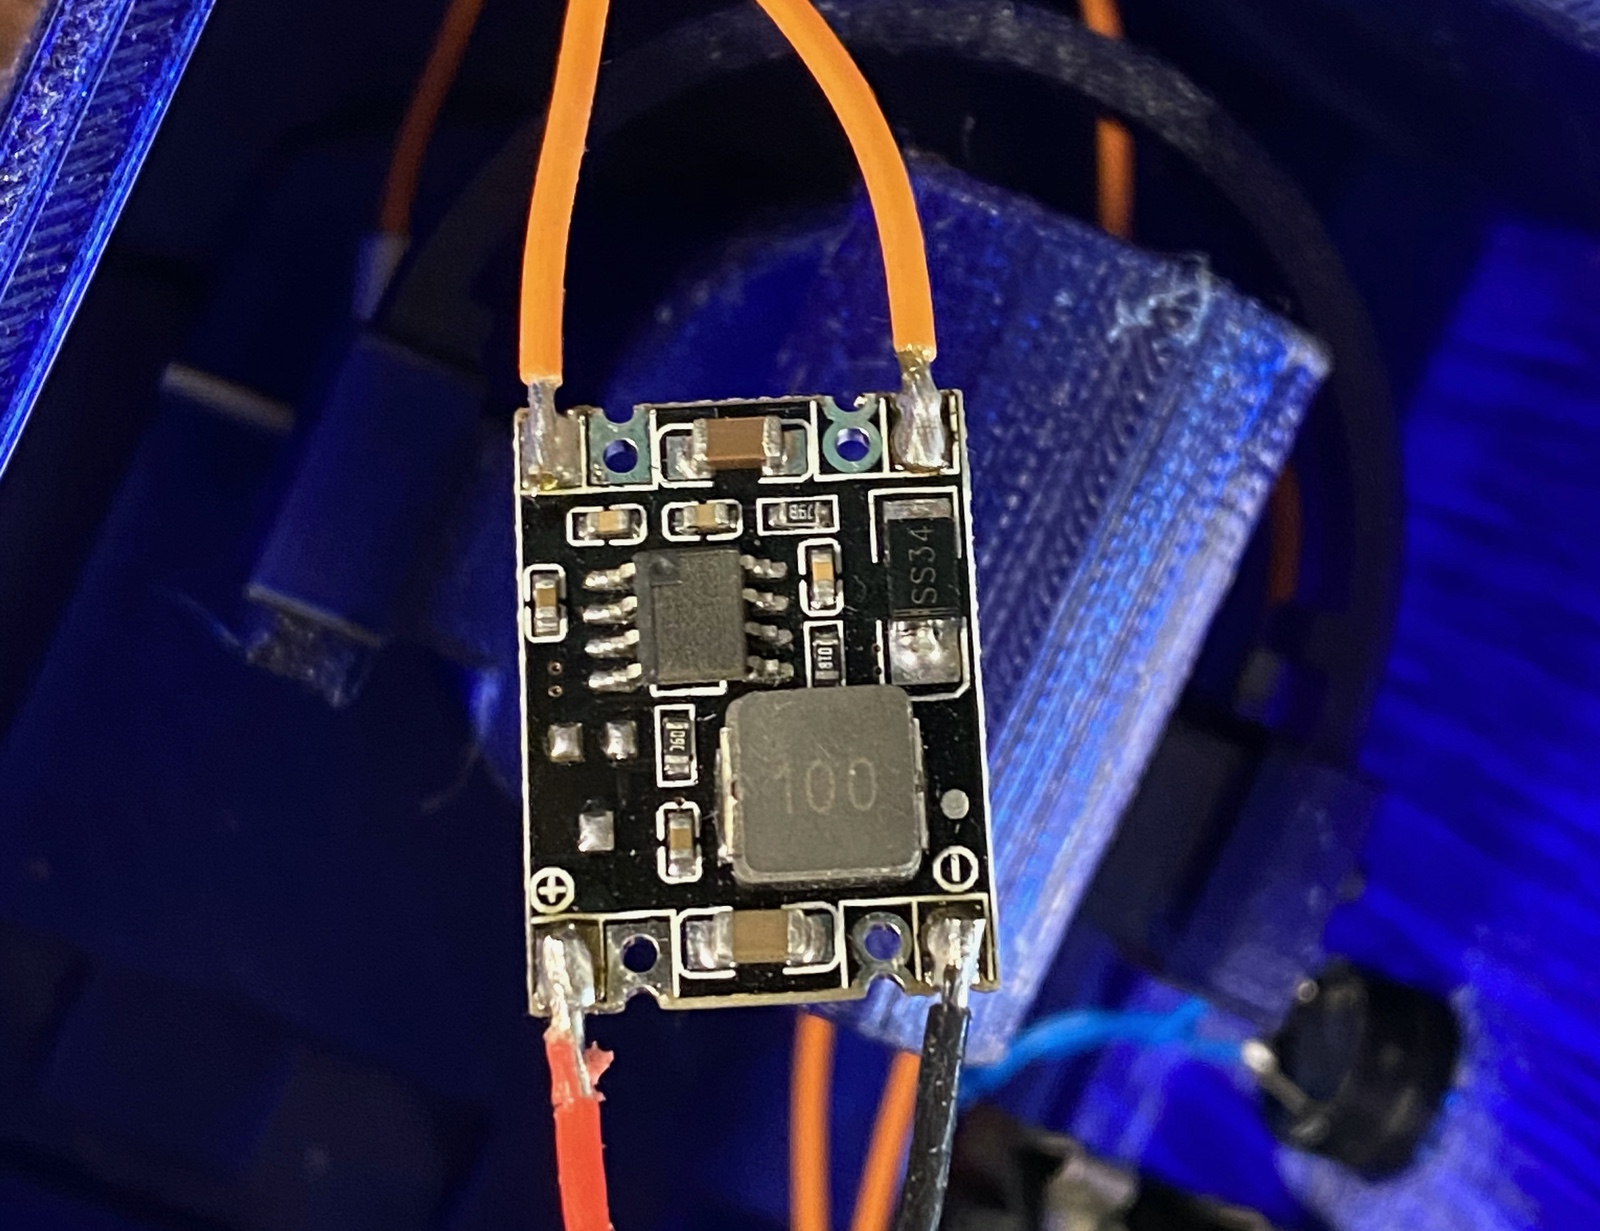
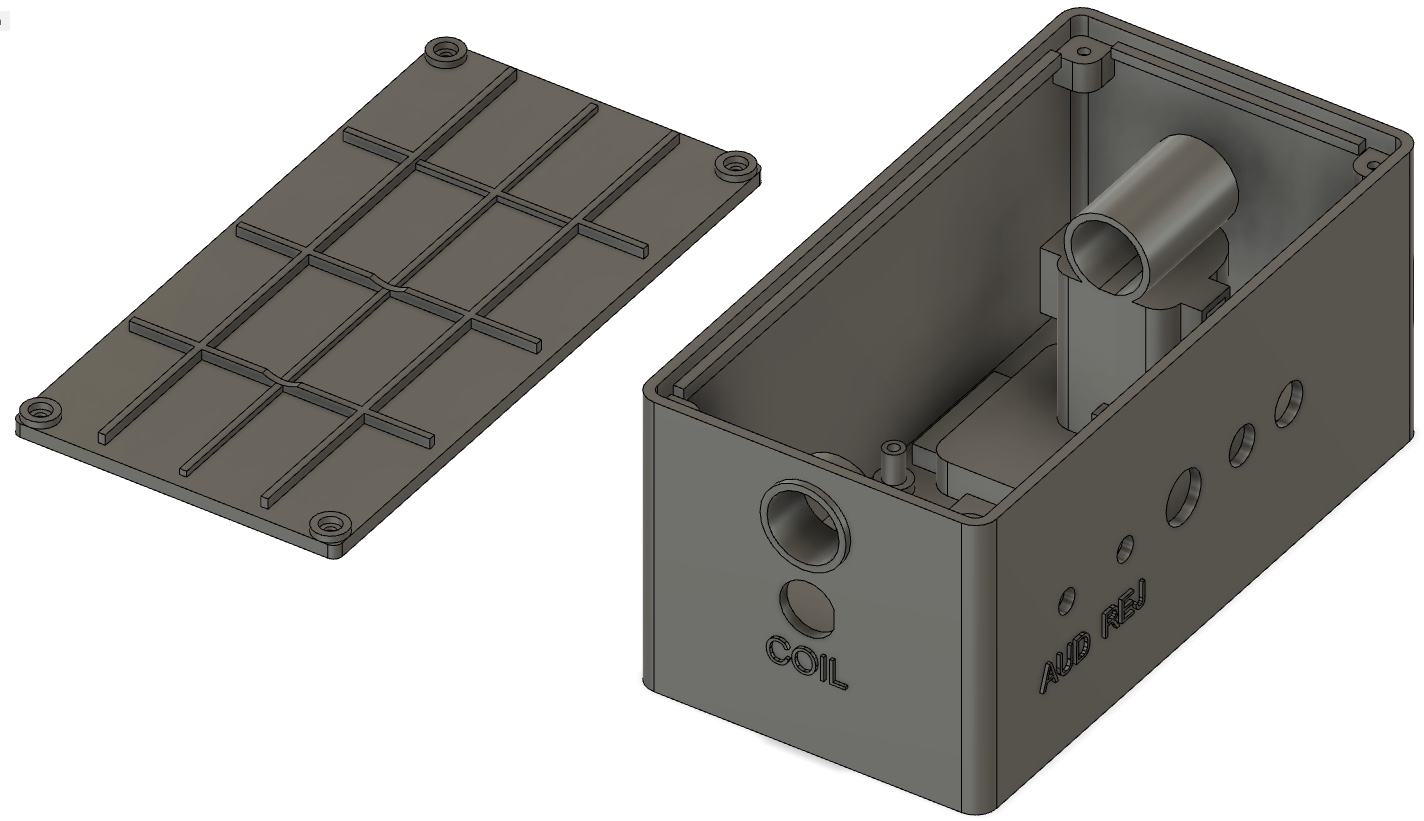
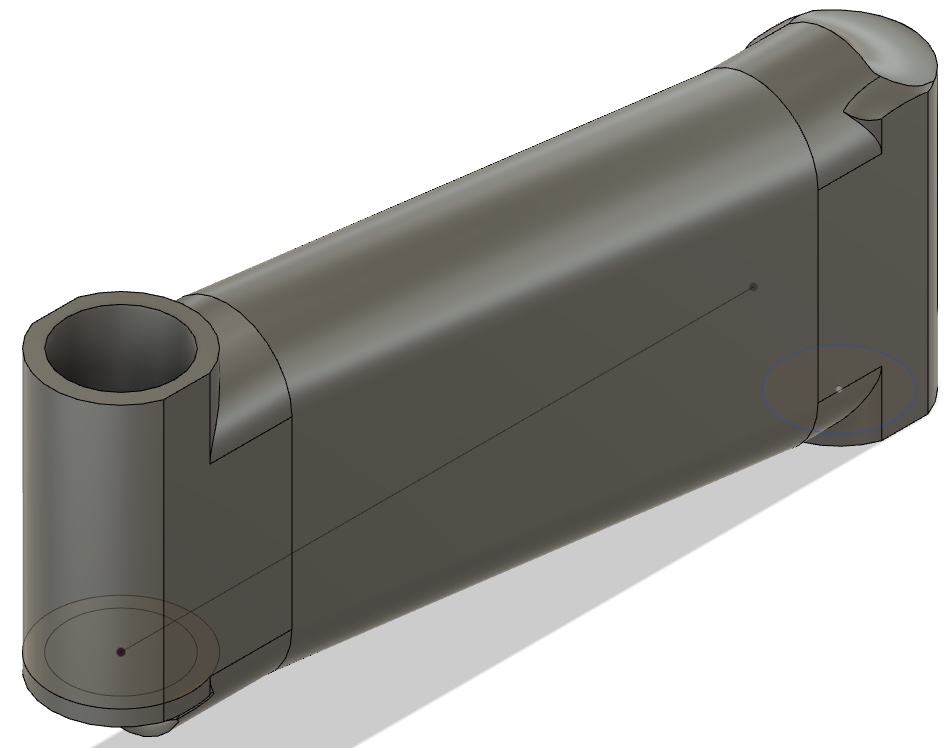
So with that in mind I set out to make a 3D model of the underside of the drill these batteries connect to. It took three prototypes before I had one that would let the drill pack click in snugly without rattles, but on that third one I just decided to finish it and did everything down to the full case with holes for the headphone jack, coil plug and the lid. The final print was fantastic - having a 5 hour window for the print meant I selected best quality options and both lid and case turned out great. Or well enough anyway. PETG always seems to have a lot of stringing.
(On the way home to this print I stopped at the hardware store to pick up some 20mm electrical conduit for the wand - I found "20mm" PVC pipe before I got tot he electrical section so I got that instead - be warned, "20mm" PVC is internal diameter, "20mm" electrical conduit is outside diameter. Oh well the white stuff that is too big will be useful one day.)
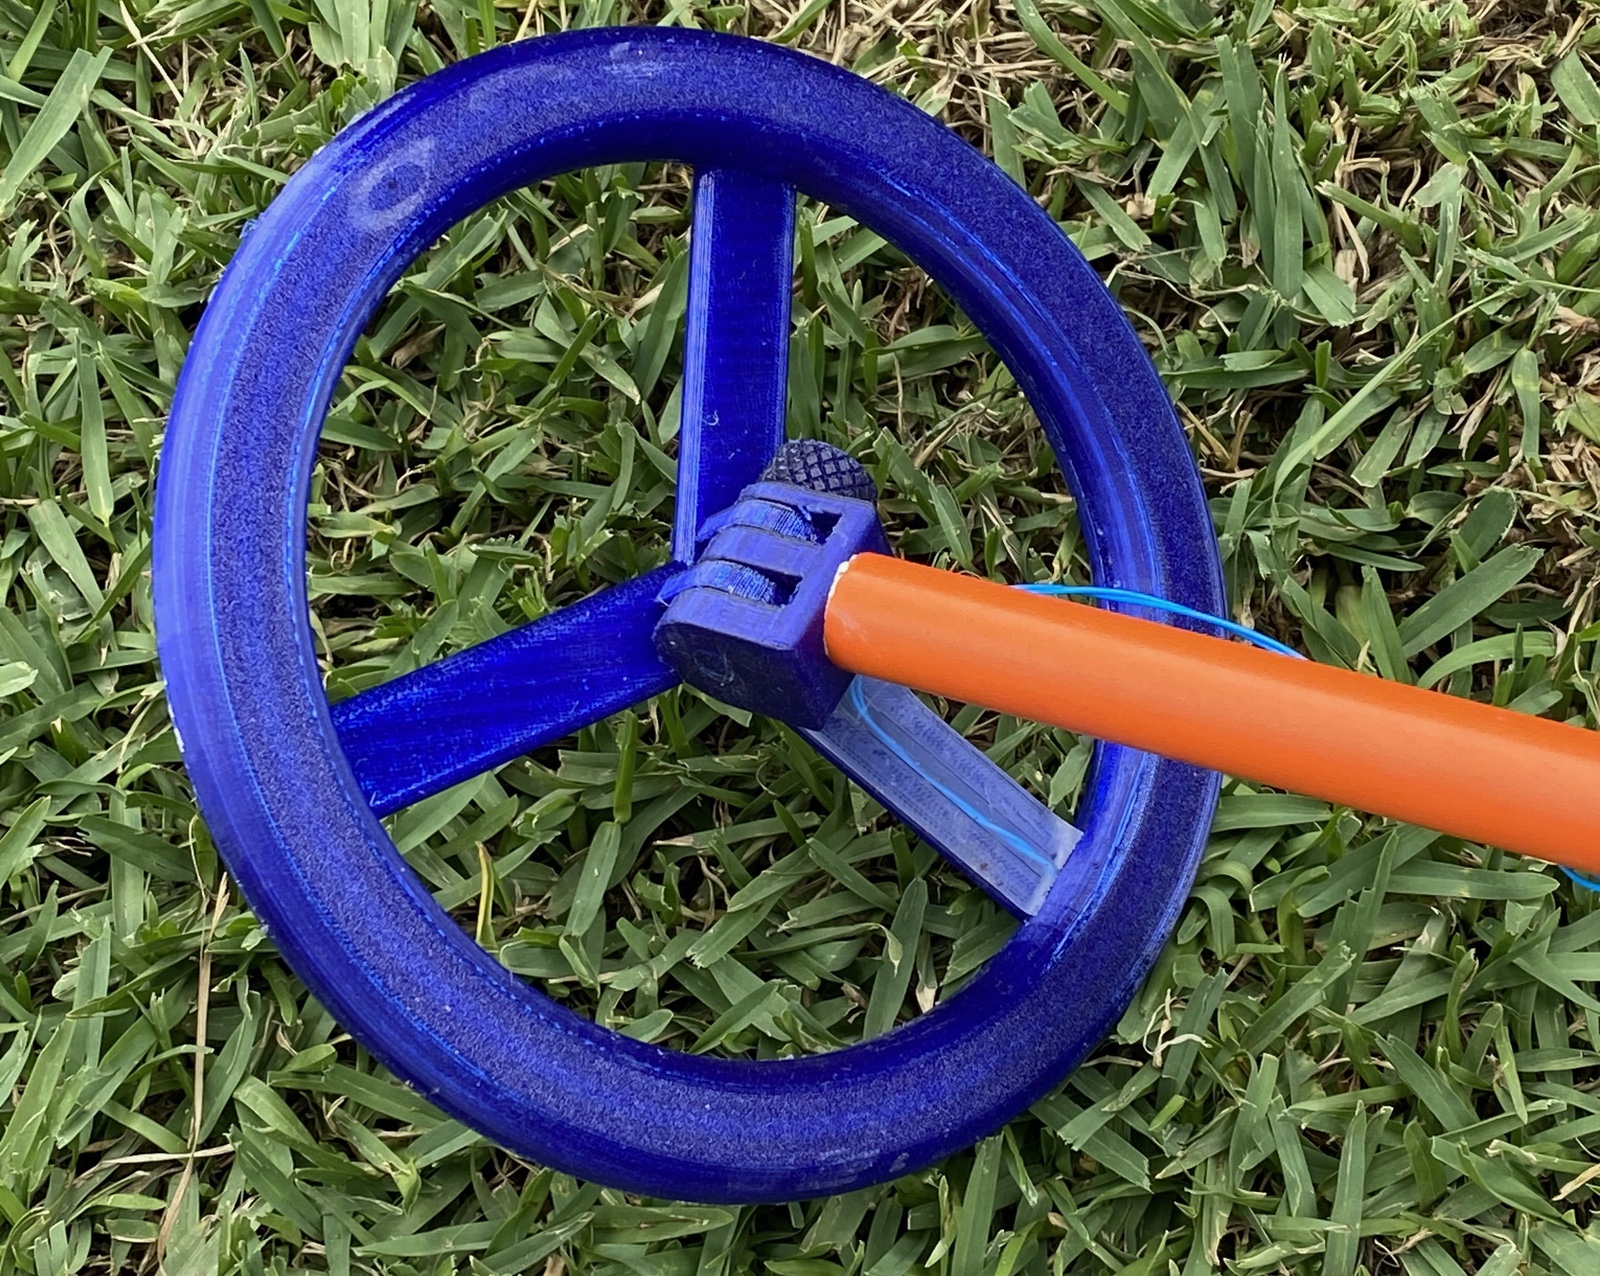
Next up is the coil. Some years ago I printed a coil former with the aim of building a low capacitance coil, separating the coil windings and achieving a 90 degree crossing of the wires as much as possible. To protect this coil it needs a housing and the entire coil assembly needs to be adjustable to it stays relatively flat to the ground, that angle being adjustable depending on the user's height. The coil is 200mm diameter so any housing is very close to the capacity of my 3D printer...
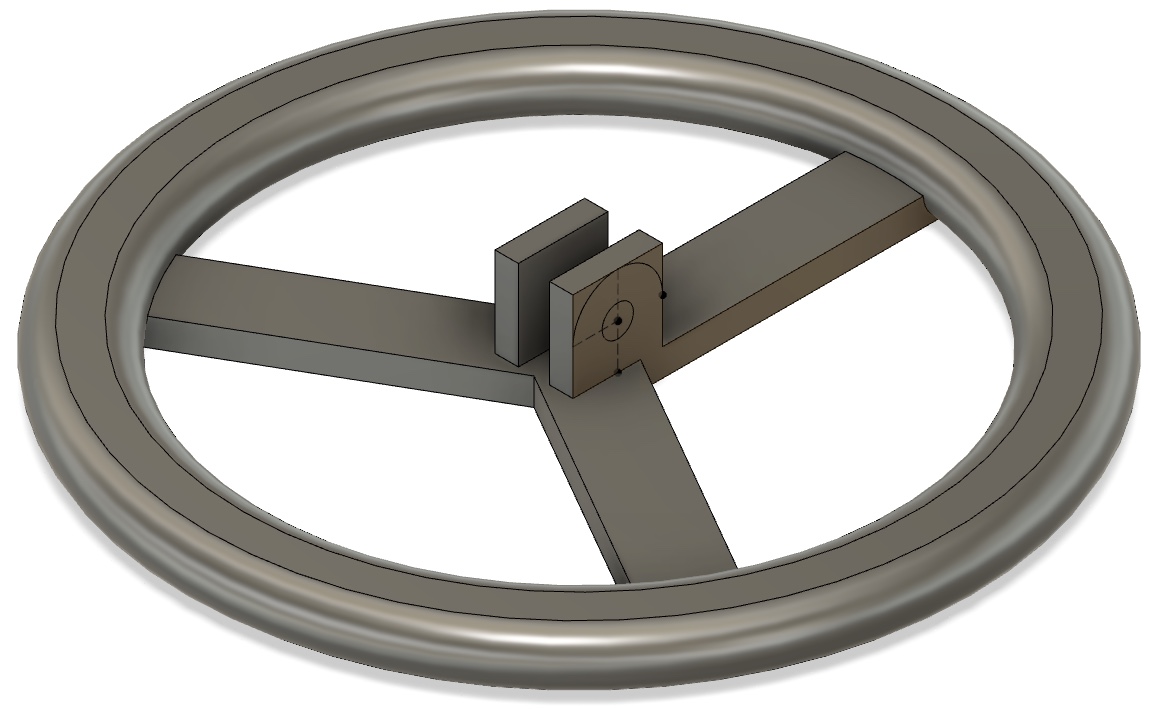
The angle adjustment is achieved by having interlocking vanes with a 3D-printed bolt holding it all together. It's a good idea to keep metal away from the coil so while I could have bought a much stronger nylon bolt and nut, I just printed a thread on the bolt and on the last plate of the fingers so that the coil angle can be adjusted and the bolt tightened. Fusion 360 makes this incredibly easy - just pick the "Thread" tool under the Create menu and make sure both tapped hole and bolt have the same kind of thread applied. I thought I would be looking up thread measurements and applying formula for hours here. The thread print takes a while, obviously the better it is printed the smoother the thread will be.
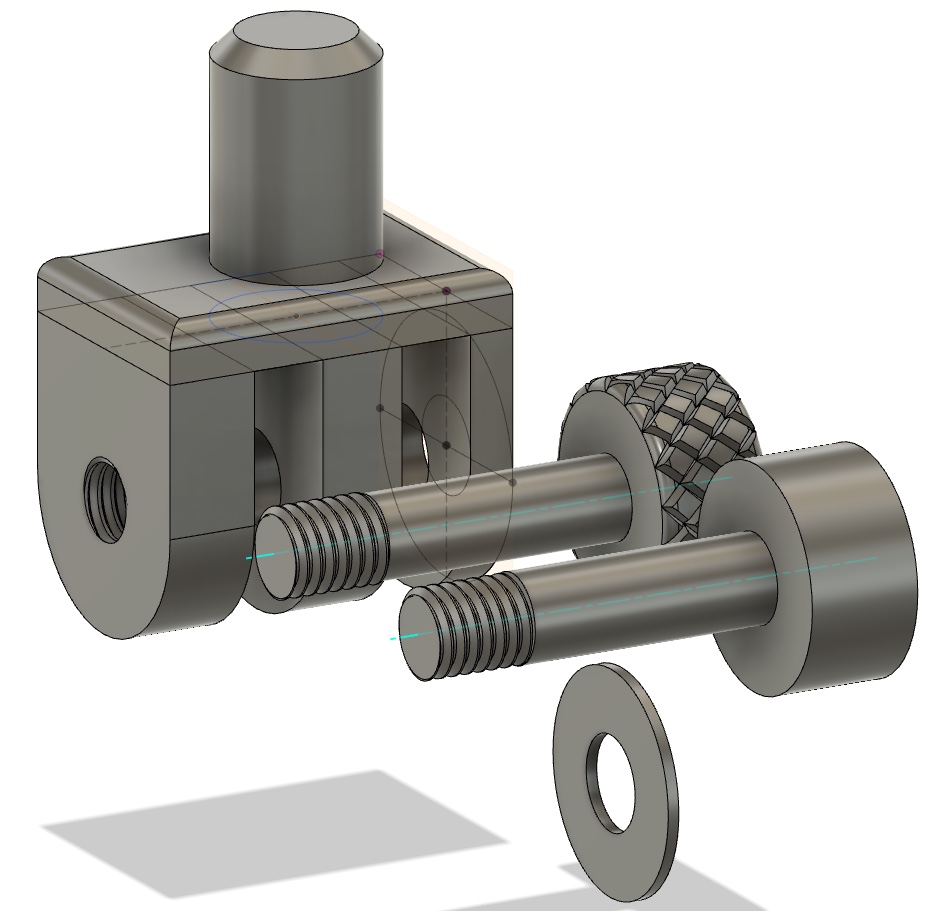
Unless your printer is really dialled in, 3D printed threads don't work all that well unless you touch up the threads with a real tap & die set.
Joining all the parts is the 20mm orange electrical conduit. Tarzan's Grip glue is great for joining this to printed parts. Because it expands to fit space by absorbing moisture it fills gaps. If the fit between conduit and printed part is something that is going to be held in place by expansion, like a printed cylinder fitting inside the conduit, it's secure. One piece of conduit acts as the wand of the detector, joining the coil pivot to the handle. Another is hidden, coming from the other side of the handle into the metal detector housing.
And the result is this. It's far from finished, but it is ready to use. When I rework this design I will try to decrease the size of the box, probably by making the battery mount from the rear as it does on the line cutter.
Now to find some gold.