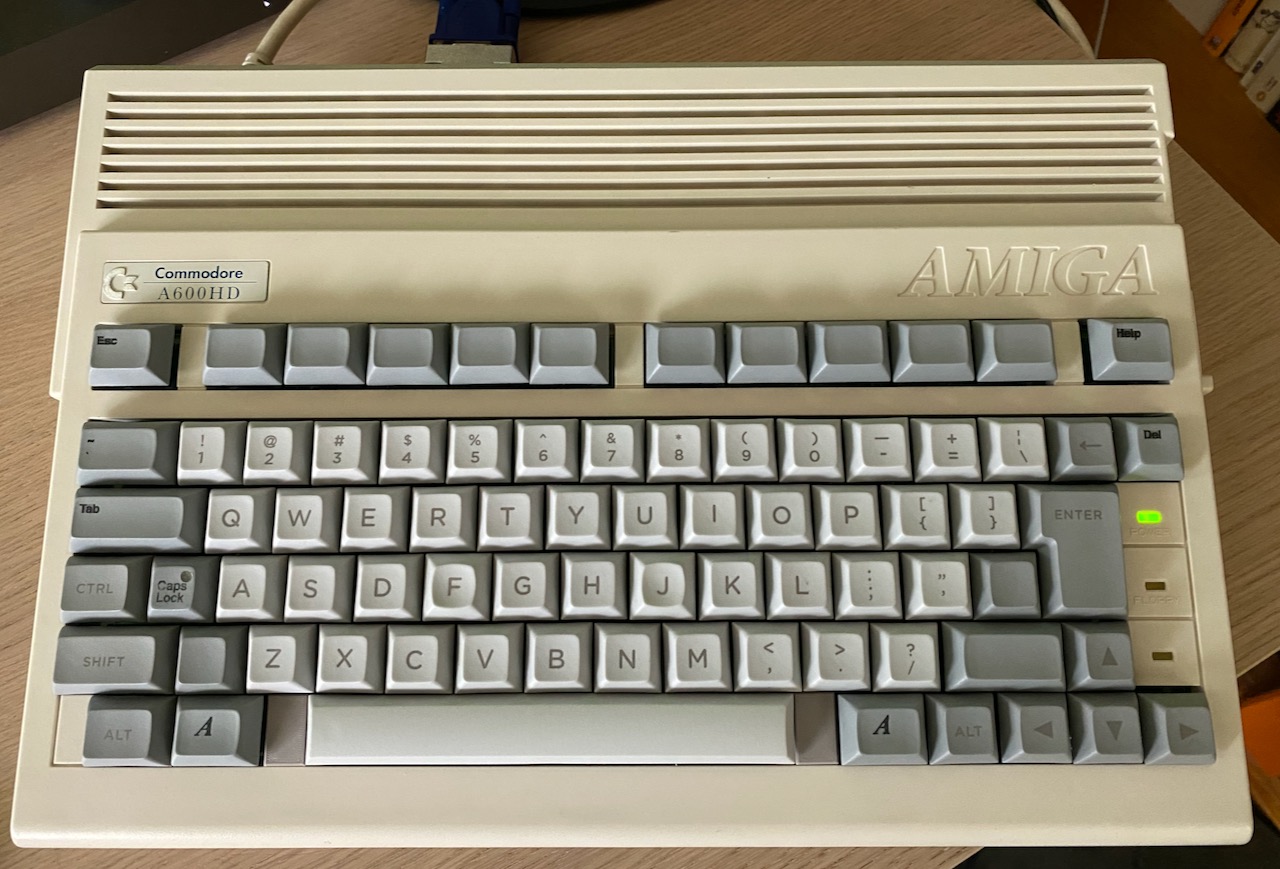
Amiga 600 Keyboard
What about my A600?
A while ago I made a mechanical keyboard for the Amiga 1200, and it was a success. I'm using one, and I've just finished a Rev 3 version of the PCB that should be back in a week or so. But Amiga 600 owners said "What about a keyboard for the A600?" - "I don't have one" I said - so very kindly, user ExtremeWays on the English Amiga Board sent me one to develop the project with. Excuse gone!
The A600
The 600 is a great little computer. It isn't AGA like the 1200 but it is compact, has IDE and PCMCIA built in and if you buy a Vampire board is one of the faster Amigas around. The keyboard is the same mushy membrane, plunger and spring arrangement found on the 1200, only it has 30 connections to the Amiga rather than 31.
Circuit
I put this off for months but once started it was easy. The A600 schematic is available in PDF format and includes an accurate keyswitch matrix so I didn't need to trace out the membrane connections as with the A1200. Having some experience and a library of FFC and MX parts to work with helped a lot too.
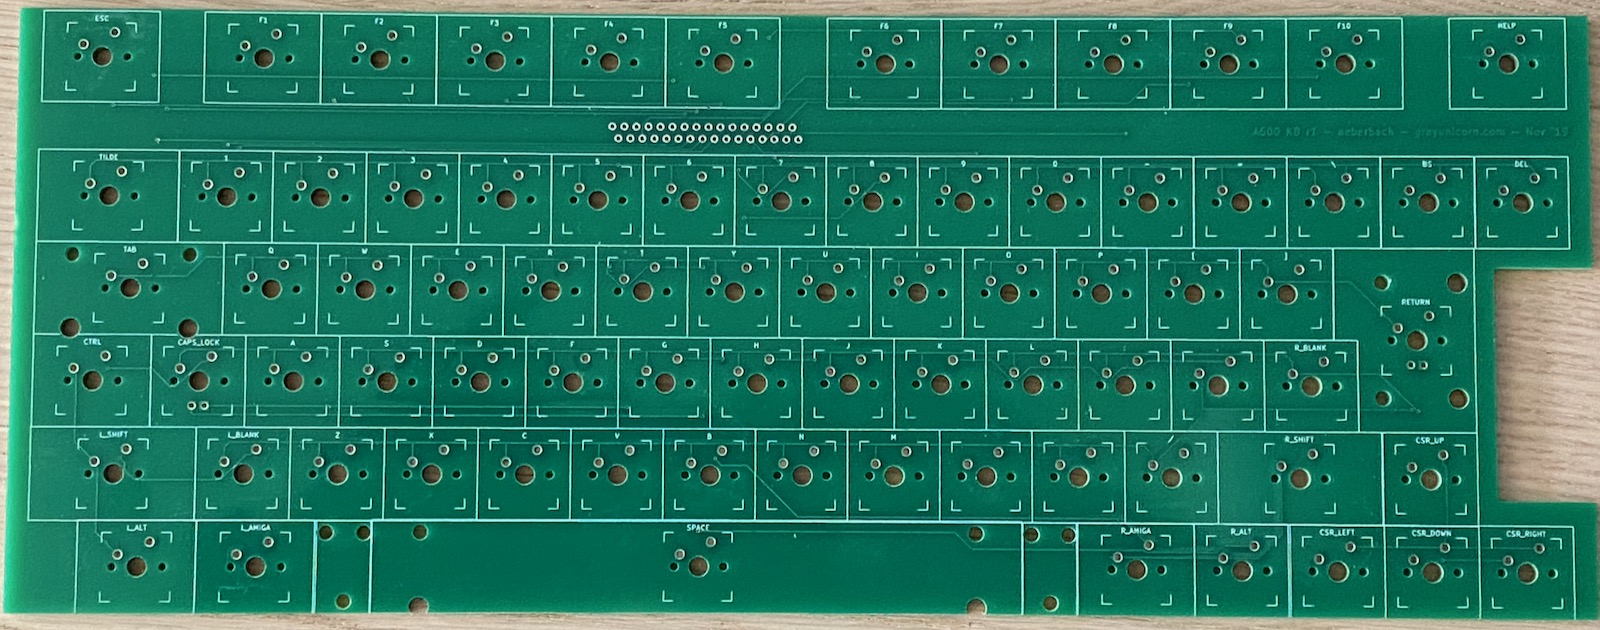
PCB
With a much smaller space to work in and a very simple clip-to-mount scheme there was never much question about the substrate - it was going to have to provide all the strength, no room for bracing, so 3.2mm thickness (the maximum my PCB maker offers) was chosen. The size of the board was exactly that of the metal assembly in the original keyboard too so that it fits into the clips. Once again the FFC connector mounts on the reverse of the keyboard with the keyswitches mounted on the front. Because there is no number pad the routing is relatively easy, there is no "split" with some traces from the ribbon connector going both left and right.
I considered making the LED board part of this board but it would have added complexity, made precise alignment even more important and replaced a functional board that most people already have for no benefit.
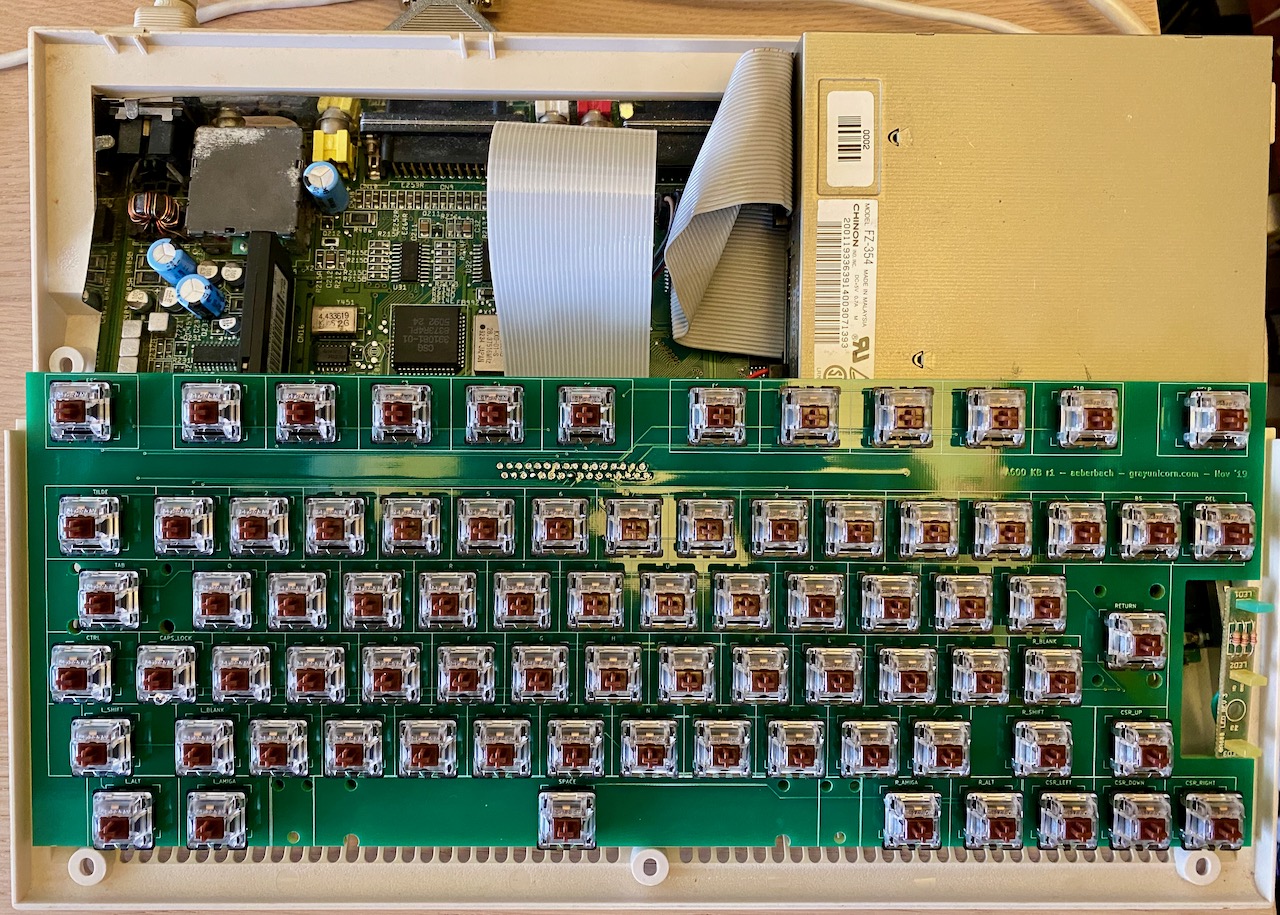
First test
With a 3.2mm substrate the solder remains fairly flat to the board, with the keyswitch pins only just protruding from the plated through holes. This is great because it's fairly easy to clean off the flux residue with cotton buds and alcohol, no sharp pins tearing the cotton apart.
When the board was done I noticed the machine had a 2.0 ROM fitted. I had turned it on when it arrived but not tried to boot anything. Since I only have 3.1.4 ROMs and Workbench nothing worked, could do nothing except for reboot and see that the Caps Lock LED was toggling! To get around this I used a F2R16 module and loaded the latest DiagROM - you rock Chucky!
Once DiagROM loaded I tested the keys - of course forgetting that testing Esc quits the keyboard test routine a few times along the way - and everything was perfect.
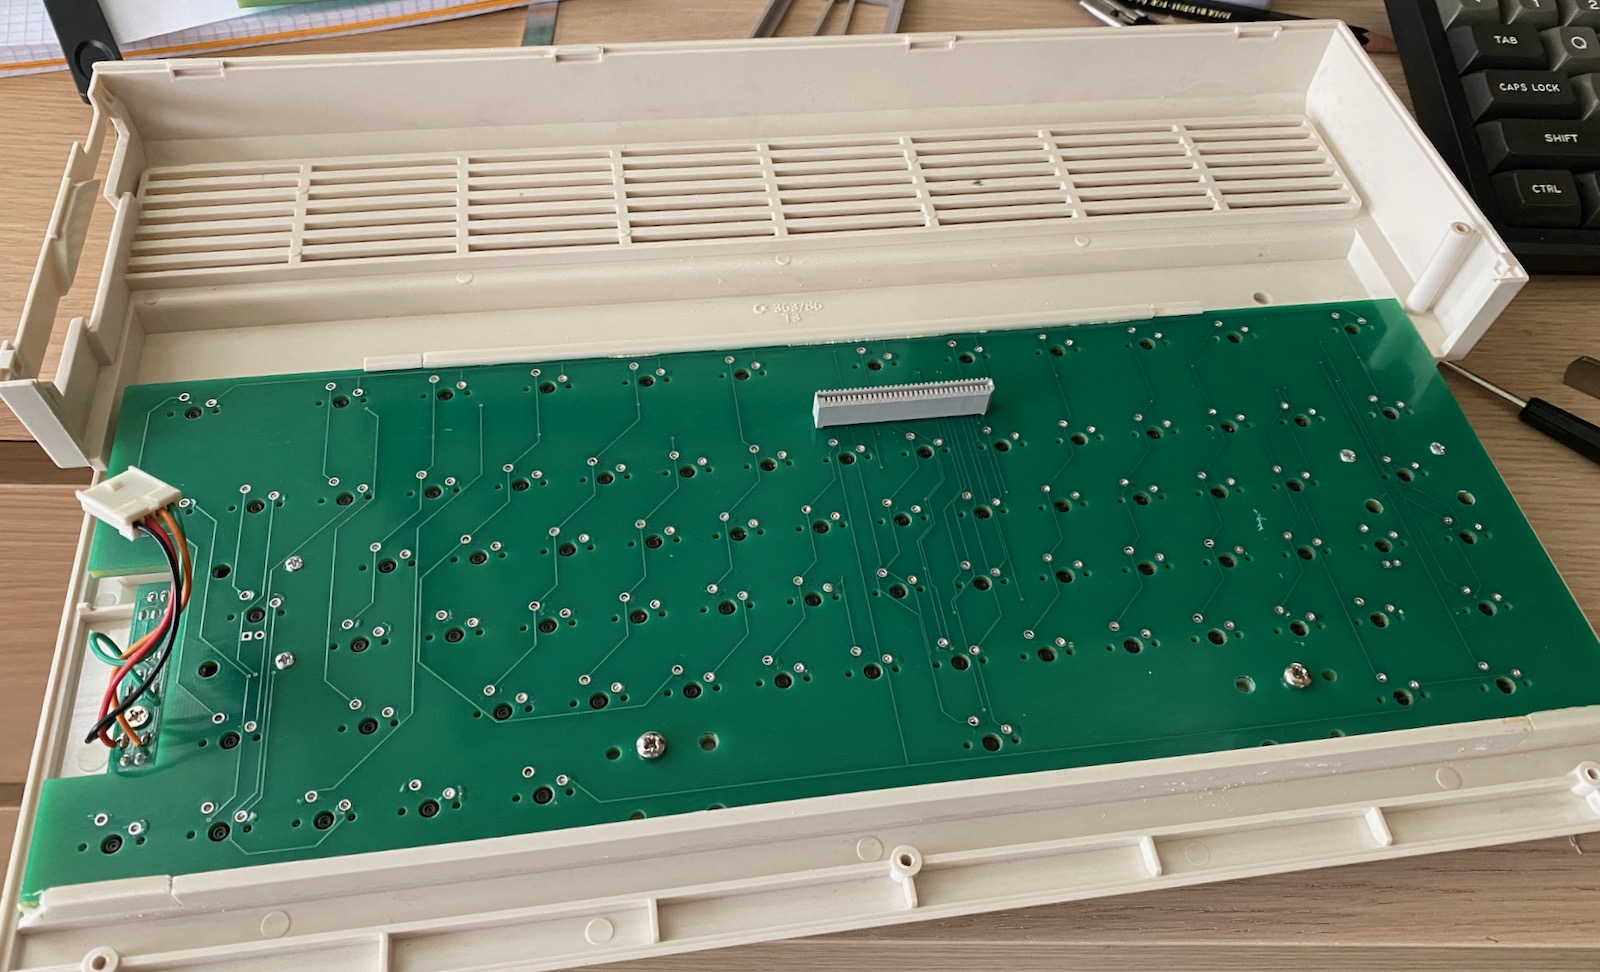
Mounting
One long, and two small, plastic clips hold the keyboard to the top case of the A600. These essentially give the PCB the depth that it doesn't have compared to the original keyboard module, so it fits in to the clips exactly the same way. Unfortunately there is so little room in the Amiga that the programming headers on the F2R16 module stick up and obstruct the PCB when it is fitted into the clips, so I had to remove them - will have to replace them before reprogramming or work out a way to keep them low.
The MX keyswitch sits up a tiny bit higher than the original keyswitches and I just don't think there is a way around that. Inside the Amiga the bottom of the board just can't sit any lower, plastic mouldings in the case get in the way. I did try mounting one PCB with the top of the substrate flush with the top of the clips - used a router to make a groove in the PCB, then designed a 3D-printed clip to hold it in place but it was not a success. While the keycaps arrived at the perfect height, the case could not close.
If you're making one, print two sections of rail from the STL files. One has a tiny bit trimmed off so that it fits between the two small case clips. Two short sections of rail go either side of the long case clip. These must be fixed in place (glued) so that the keyboard is perfectly centred. Also don't make the two small pieces of rail too long or they will obstruct moulding in the lower half of the case when you try to close it up.
Keycaps
Weird keycaps are familiar to anyone that has tried to replace Amiga keys. The A600 makes this even worse, with 1.5U Esc key, 1U BS, 1U Del, 1.5U Shift etc. - these are impossible to buy. Then you get to the 1.25U Help, 2U Tab, 1.25U F and Amiga keys - also unobtainable. I decided to make some.
I used a laser engraver from eBay, called "INSMA", claiming to be 3000mW. This piece of garbage makes me angry every time I use it. Awful software, next to no safety, absolutely broken as designed - the USB plug can't even reach its socket properly through the plastic case! The power supply exploded and was replaced. Deep breath, stop thinking about it...
In the end I made some caps by dipping blanks in laser toner and then engraving to fuse the toner. Not great, just OK. Took way too long and was way too frustrating. Don't buy a cheap laser engraver because they are just junk.
Space
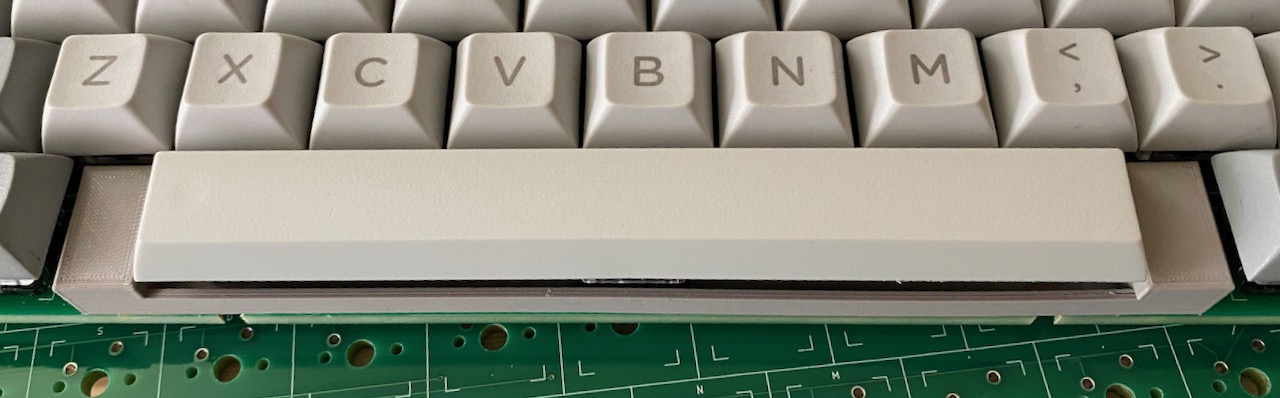
One of Commodore's weirdest features has always been the space bar. I'm sure others have used 9U spacebars but I can't name any machines off-hand. The A600 doesn't use that, it uses an 8U spacebar! Now Signature Plastics does sell 8U and 9U spacebars but they are the only source I know of. If they sell out and decide not to make more that could be it, so I went for a 7U spacebar.
The original plan was to use a conventional 7U arrangement and to make 1/2U spacer blocks that plug into the 3 holes I placed in the PCB for that purpose. I found they were a little too tall and skinny to fix securely so made an integrated spacer and stabiliser unit:
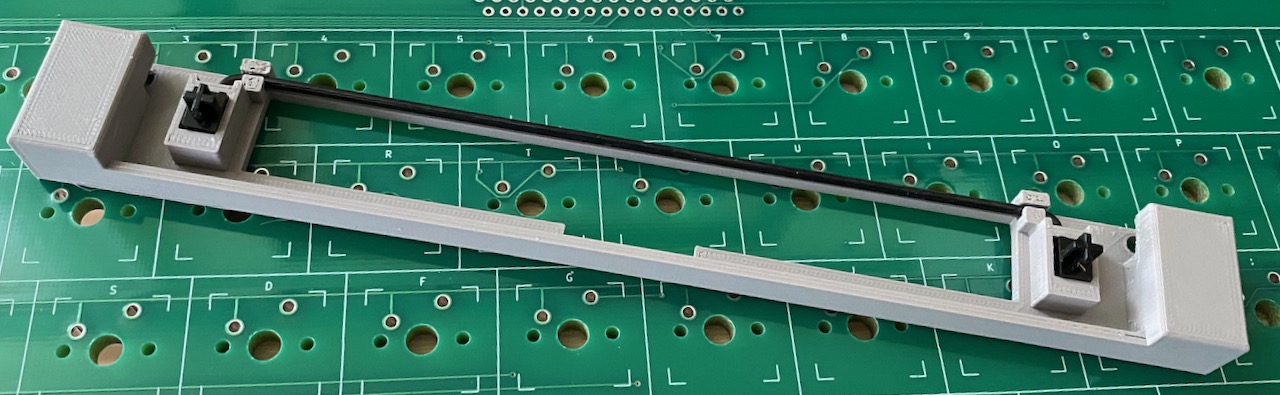
I did not expect the 3D printer to be able to consistently produce prints that would allow the key stabilisers to work smoothly, but it does. The whole thing fastens to the PCB with two M3 nuts and bolts. You can buy wire for 7U stabilisers but I didn't have any so again bent a used bicycle spoke. At 1.8mm this is the perfect substitute wire. Just bend accurately and at a good right angle or you get a spacebar that will go down but doesn't come back up.
The result!
This is it! If I'm ever going to get back to the Infocom text adventures or Amiga assembly code I might have to do it on an A600. This keyboard really feels good.
Where can I get one!?
Chances are I have none for sale - but you can ask. More likely you will need to go to my repository on GitHub and have the PCBs made yourself. This is pretty expensive if you have one made, much more affordable if you can get 5 others who will pitch in and want a PCB too. You will also need to download the STL files and print the 3D-printed parts yourself. Apart from PCB and printing, you need 78 MX PCB-mount switches, a 32-way FFC connector (Mouser part number 538-52044-3245), a 32-way ribbon cable (Mouser part number 538-15168-0400), stabilisers, keycaps and one 3mm LED.