Amiga 1200 Complete
The Amiga I was given last year has just about everything I wanted to add to it - this is the summary.
Re-capping
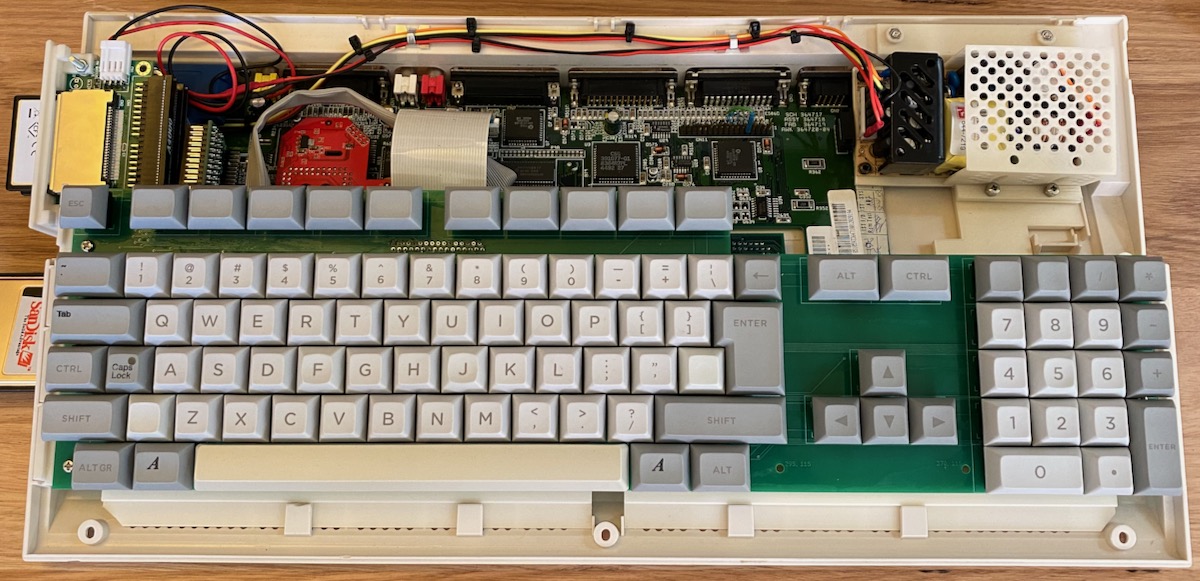
Like just about every Amiga, new electrolytic capacitors. It’s an easy job and even if it works at first, best to do it and be sure. Only the one behind the keyboard connector is at all difficult to reach.
Hyperion Workbench 3.1.4 + update
I bought the kit from Amiga on the Lake when it was available for under fifty bucks. The whole kit was two ROMs and five floppies. I don’t know if it is the best version available but it works for the software I want to run. If you want this there are people still selling it for reasonable prices, but eBay opportunists asking $150 are dreaming.
(That 3.5" floppy box in the photo - I think that came free with one of the first ten packs of floppies I ever bought.)

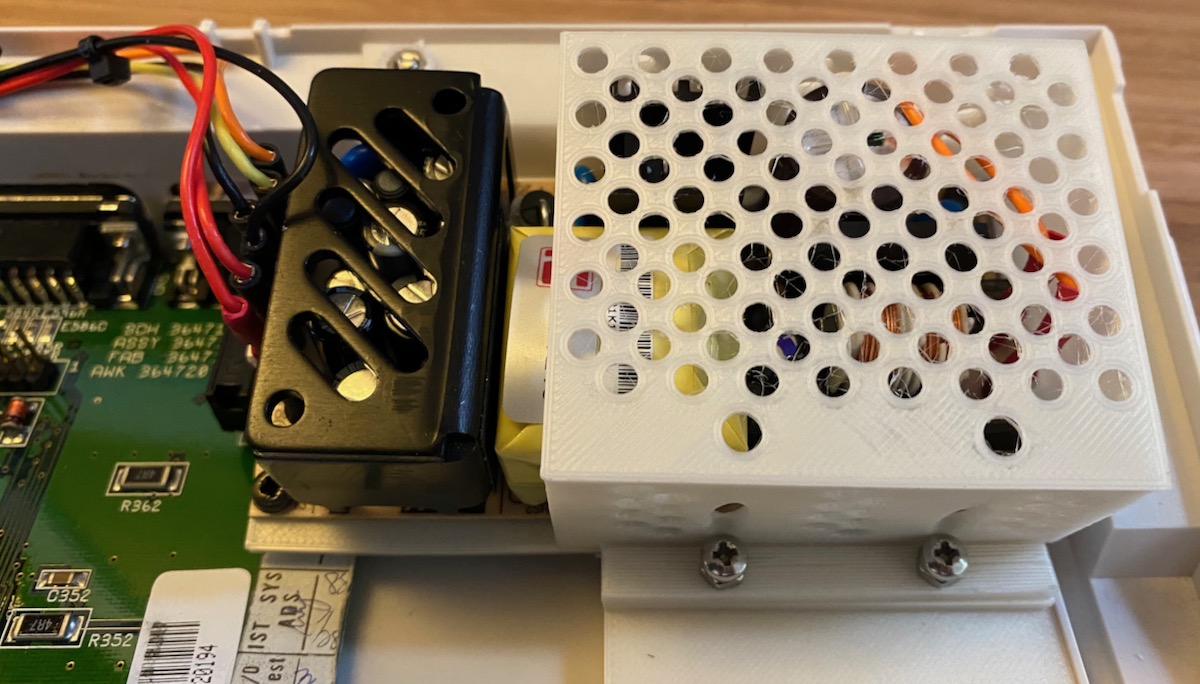
Internal Power Supply
This has been the subject of another post, but briefly the floppy drive is gone and a MeanWell RPT-60B module sits in its place. The power switch and mains cable socket are mounted in a 3D printed assembly that also holds the 9-pin mouse socket. Way nicer than having a power brick attached!
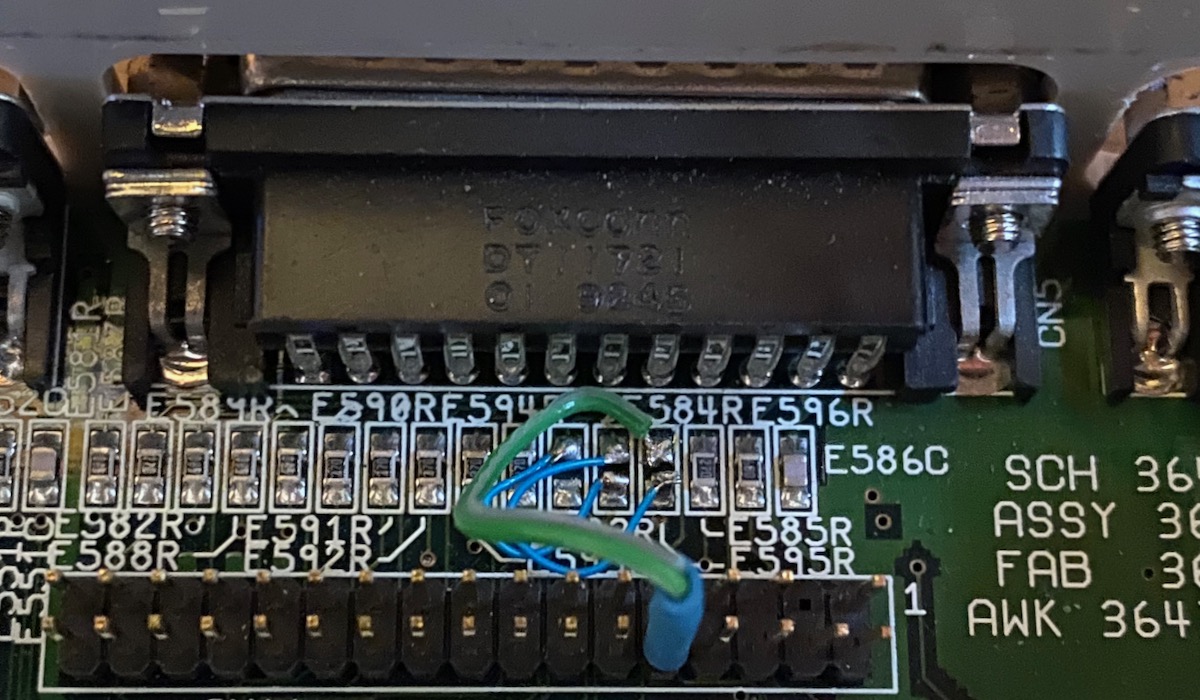
Floppy shuffle
With the power supply there is no room for an internal floppy. Not that one is needed often, but you do occasionally want need a DF0: to exist. After some schematic investigations I shuffled the drive select signal so that the first drive connected to the external connector is DF0:, then the one connected to the daisy chain of that first drive is DF1:, and so on. It’s easy to do with some short wires and by lifting some of the port resistors at the back of the board.
Where there’s no floppy connected a dummy plug with the required diode sits on the external floppy connector. Basically it tells the Amiga Workbench that there’s nothing wrong with the internal floppy (that isn’t there) and don’t wait for it to be ready when booting.
Mouse
An optical unit from AmigaKit. I don’t know how we ever used ball mouses, so horrible. One complaint I have is that it is way too light compared to all the other mice I use (containing batteries etc.) - so I might have to open it up and add some weights.

Indivision AGA MK2 CR
These are out of production now and hard to find. I looked for months and finally found one for not too much (though still way over their new cost back when they were available). But it is worth it - without it there would be no way to get the best out of the giant monitor. Though there is an annoying mode change flicker, and there is an overlay when changing modes, I now run a Workbench at a reasonable size. SO much better than using an OSSC - even with a great quality SCART cable I think this is better. The OSSC is excellent if you want a zero-delay arcade-accurate solution but I care as much about text.
The DVI connector that comes with this card carries an analog signal too so the monitor connects easily, using a DVI-VGA physical adapter from the junk box. Because the power connector and input power filter was removed from the motherboard there is room, after moving a couple of capacitors, for a 3D-printed unit to bring this DVI socket out to the back of the case.
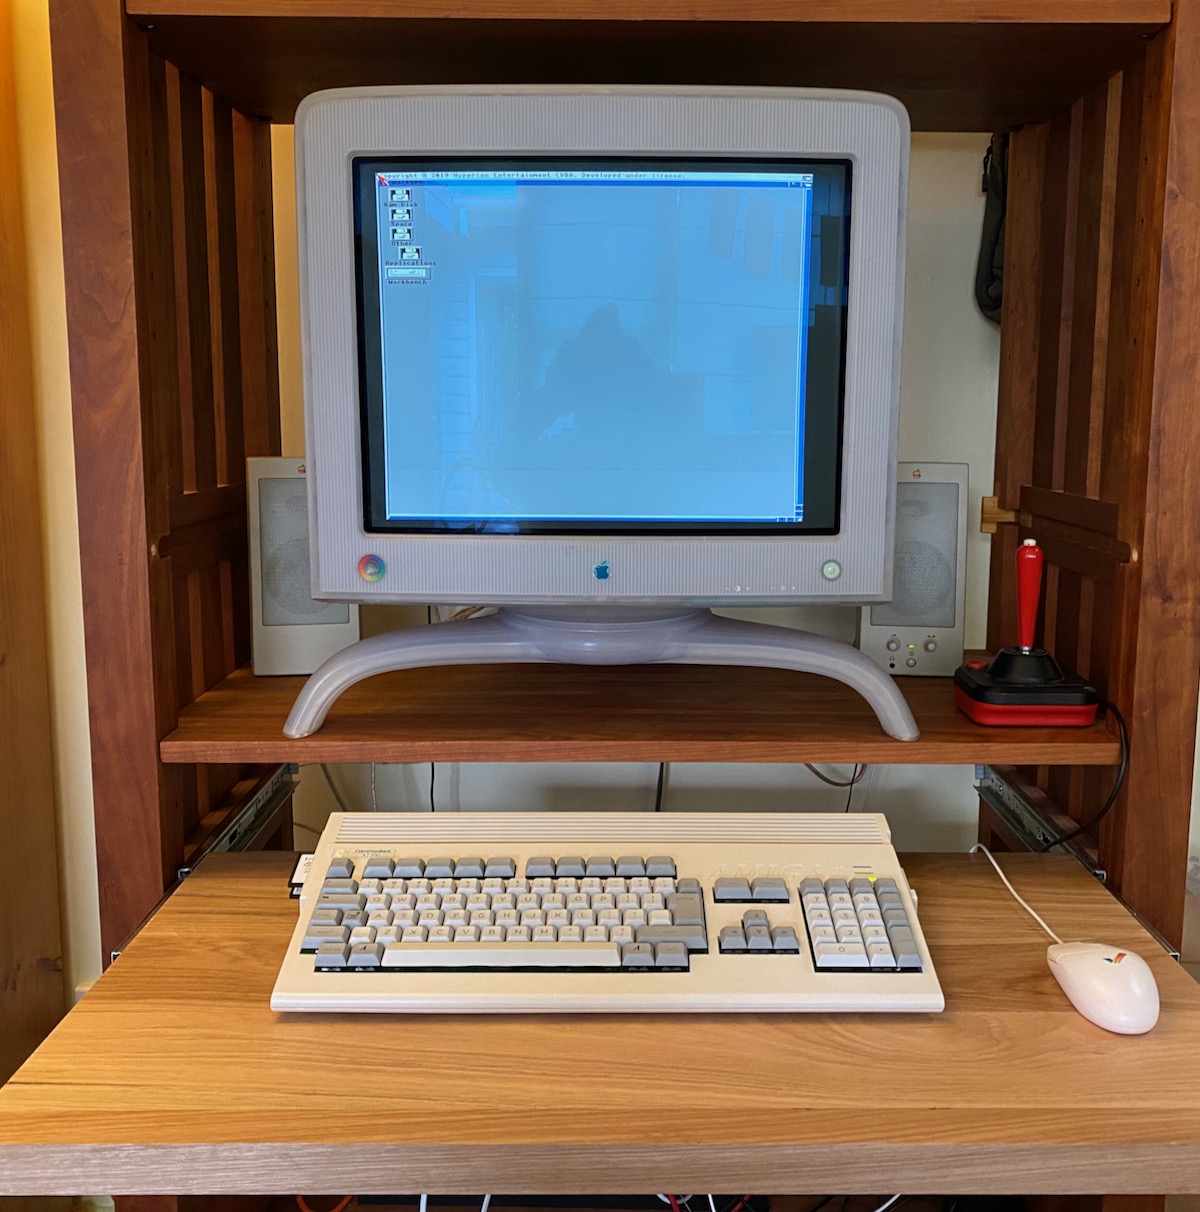
Monitor
It’s an Apple Studio Display, 21” from the blue & white G3 years. Not to be moved without careful planning! It’s so big the base only barely fits on the shelf without overhang. But it’s pretty amazing quality, a Trinitron tube with the two horizontal wires of the aperture grille just visible. This monitor connected via USB to the Macs of the time and adjustment was through software. The only physical controls are contrast and brightness, power and the colour button on the left (which appears to do nothing with no Mac connected). I expect I will be replacing capacitors in this monitor sooner or later but it will be worth it. There are a couple of monitors I would rather have, like the Graphite version or perhaps the legendary Sony GDM-FW900, but I'm not going to find one of those.
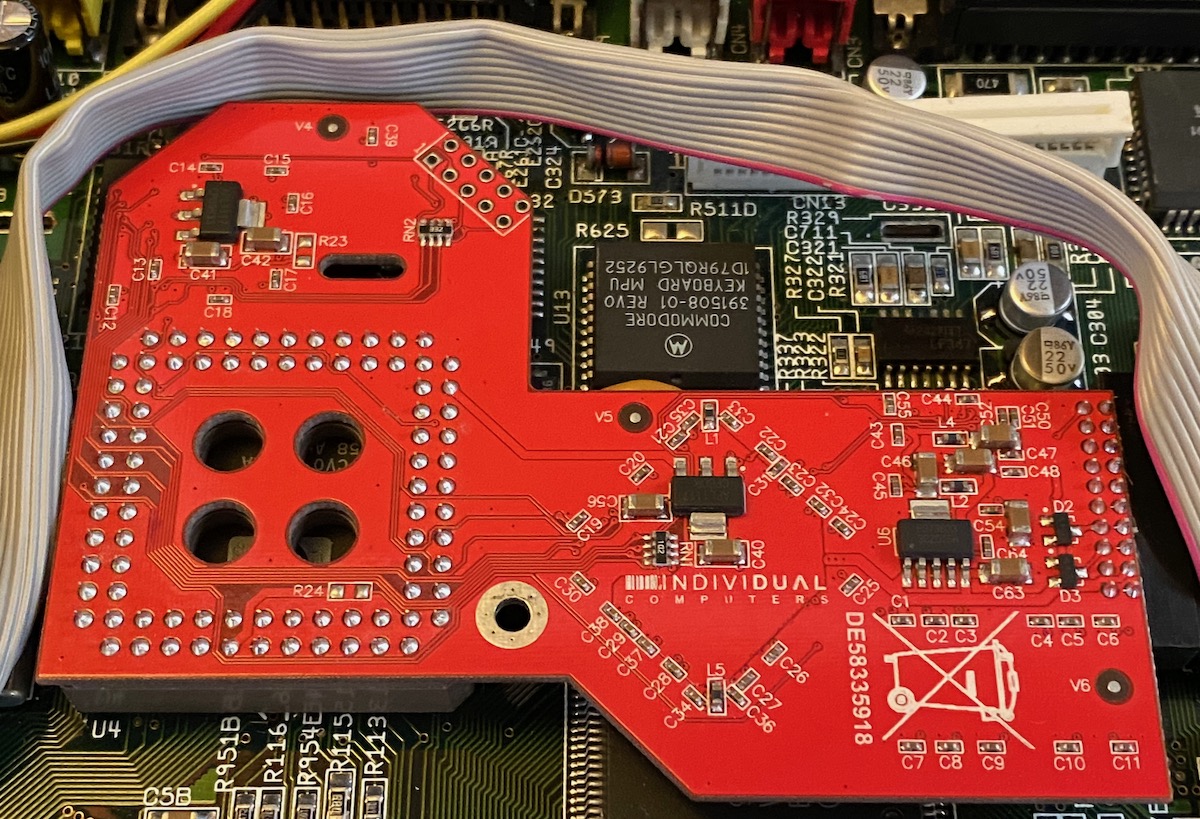
Keyboard
The Amiga 1200 keyboard was just mush and the years did not improve it. Again this was the subject of another post, but this is the third revision of my A1200 keyboard replacement PCB using Cherry MX switches. It mounts inside the Amiga with some 3D-printed rails and an aluminium rod for stiffness. I’m using genuine Cherry MX brown switches on this one - perhaps a little better than the Gateron clones and of course they cost more. The MX keyswitches are not compatible with Amiga keys so I had to make a few from blanks with laser toner and a cheap laser engraver. Not perfect but OK for now. Unfortunately my timing was bad, just as I was about to investigate having keys made it was the Golden Week holiday, now this Coronavirus lockdown has happened, but I will talk to some manufacturers about having a full international Amiga MX set produced soon - maybe crowdfunded?
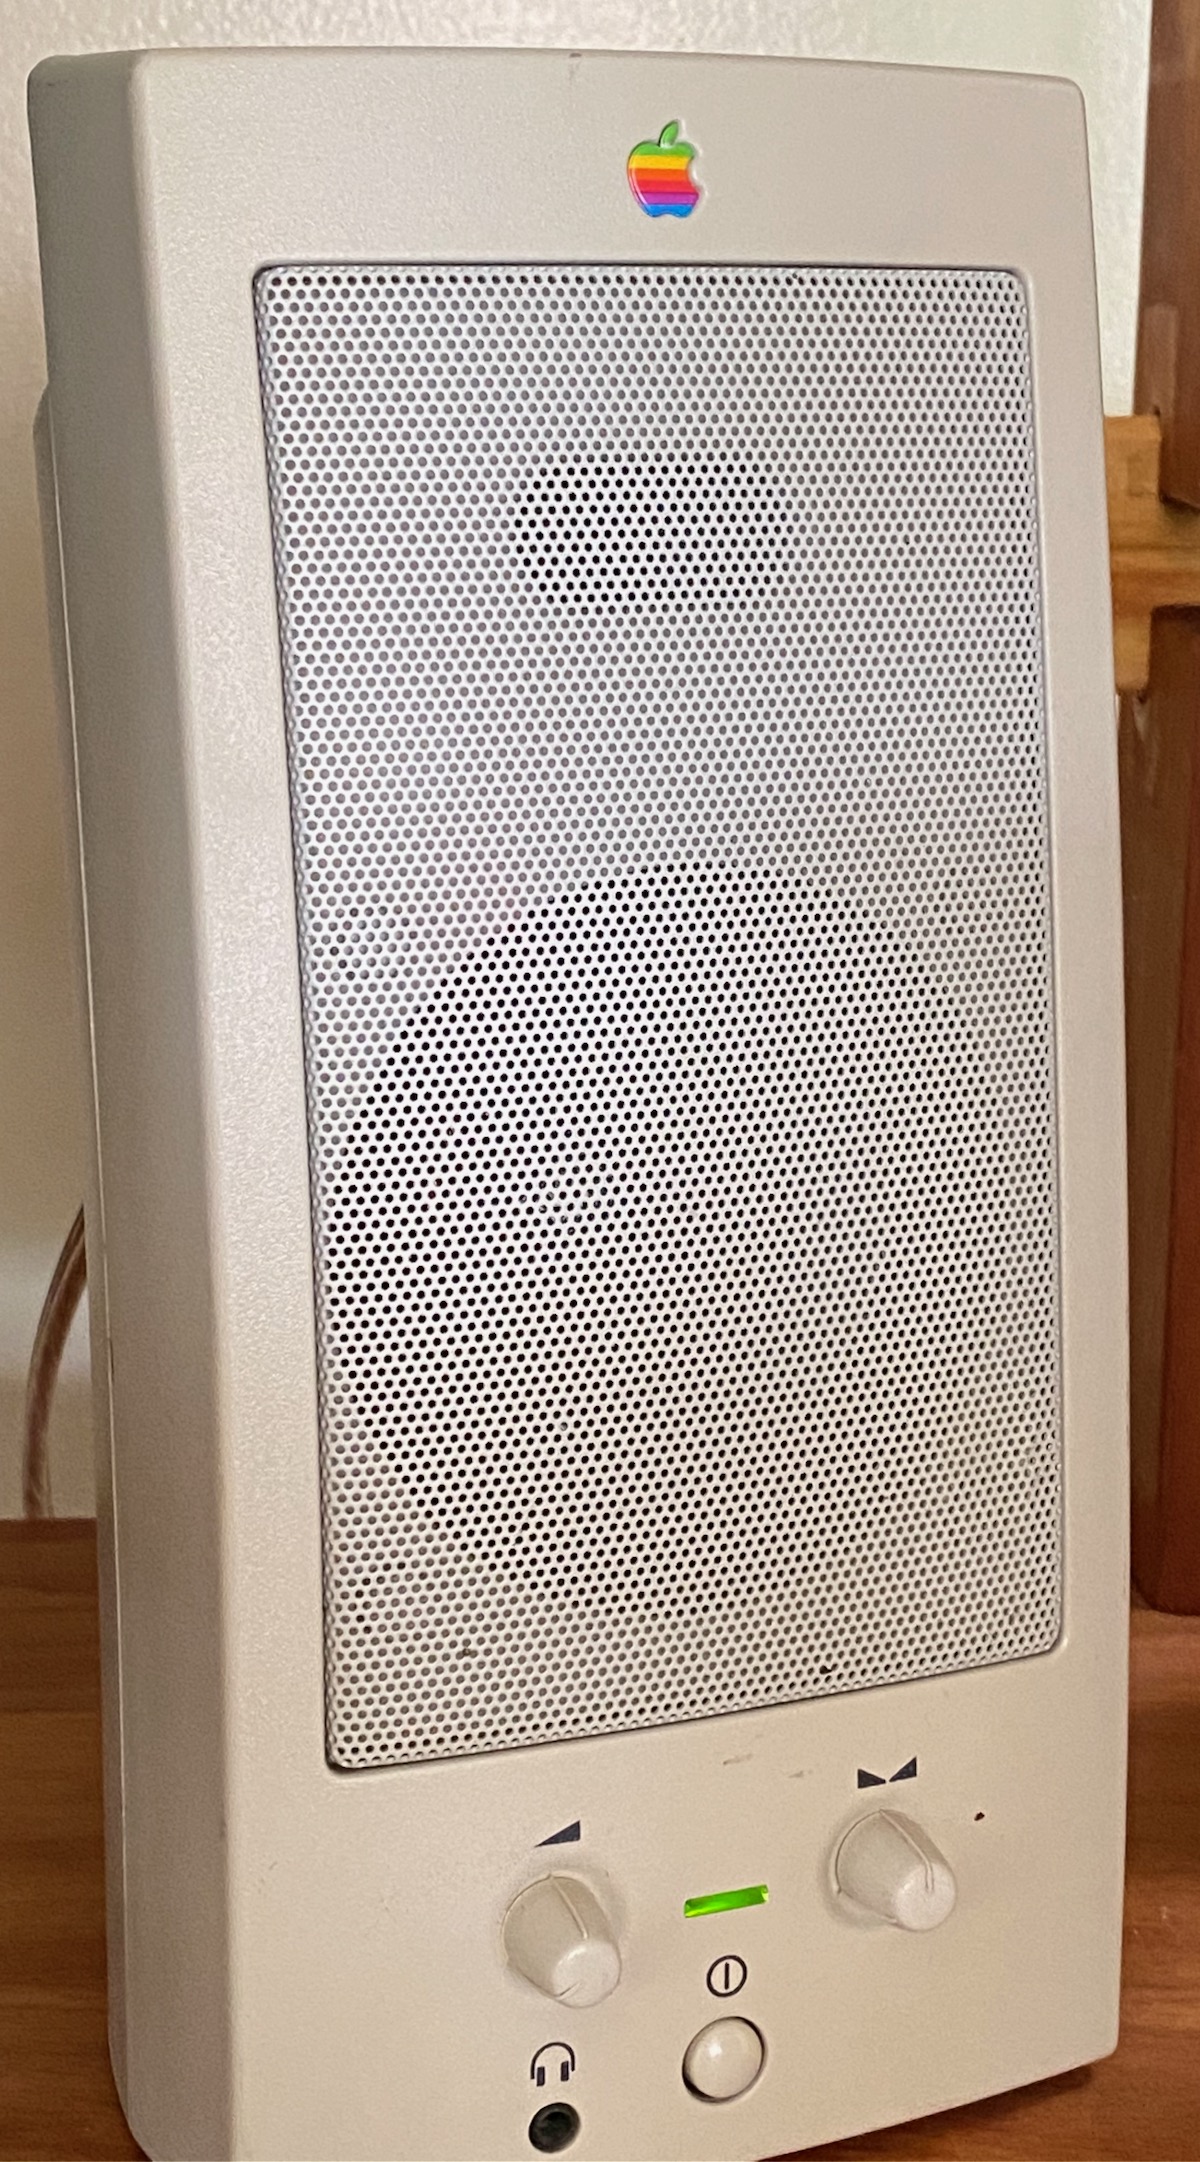
Speakers
Apple M6082 are classic beige speakers, not from Commodore but at least from around the time of the Amiga. The beige/colour logo style is probably my favourite Apple has gone through. They are a good size and sound great - once you replace the drivers. The diaphragm in these units had basically fallen away around the edge of the speaker so I replaced the drivers with car speakers. One day I might get the original speakers re-coned. Lots of inputs if you want to use them with other sources too.
Desk
I have had this ladder-shelf thing for a while. It’s a bit like an IKEA Ivar shelf unit but much more solid, American Cherry timber. We had a kitchen made recently and the cutout from the messmate benchtop left over when the sink was fitted was a good size - trimmed it up, used two sliding drawer units and the Amiga just slides away when not in use.
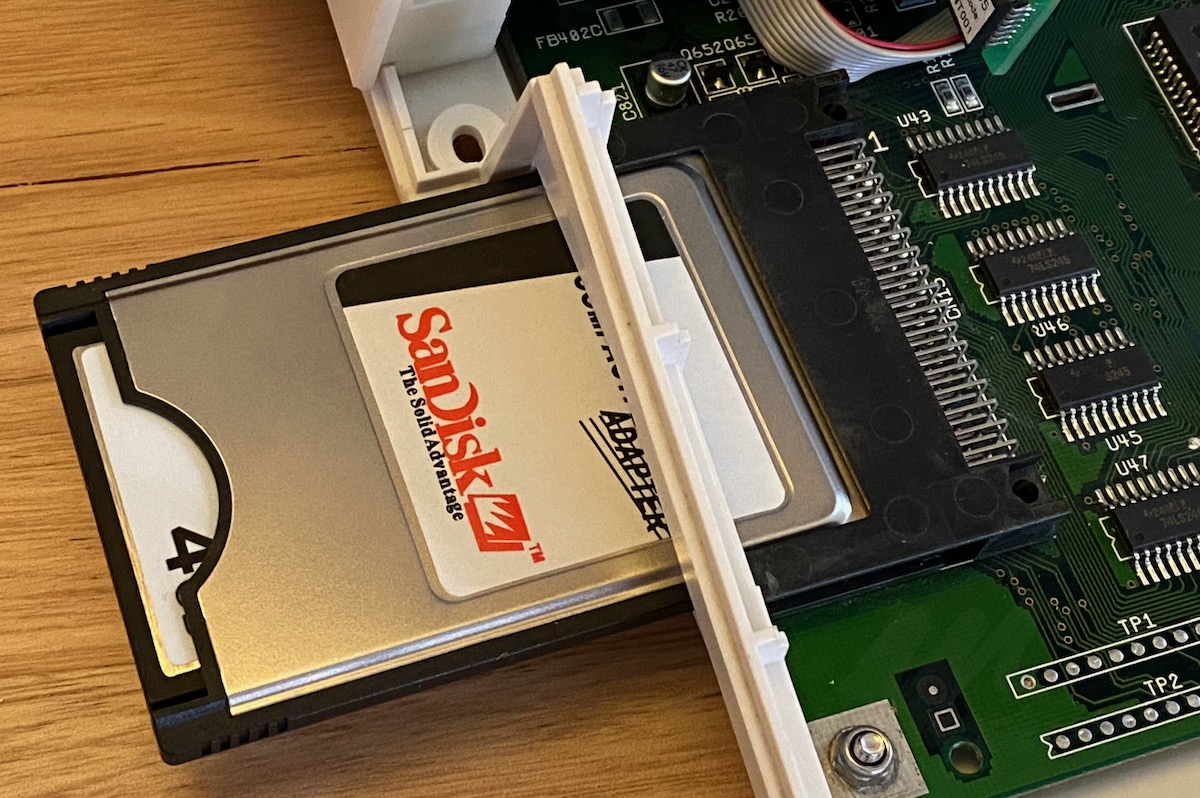
PCMCIA
By far the easiest way to get data onto an Amiga is to use a Mac. The Mac will download Amiga archives, decompress them and put them onto a FAT-formatted compact flash easily. On the Amiga the fat95 and cf133 packages (see aminet) mount this card once inserted in the PCMCIA adapter. When I bulk downloaded a lot of software it made it easy for me to decompress and arrange all the files so that I could put the CF in the Amiga and see all the icons at the top level. “The Unarchiver” handles .lha files just like any modern archive and there’s even a command line version to download if you are scripting.
4xEIDE’99 buffered disk interface
Apparently there are better IDE interfaces, certainly there are faster ones. This works well enough for me and makes two drives possible. I have the two CF cards on the primary interface and the secondary is free in case I want to add another unit. It does need software installed for anything but the primary master interface to work correctly, apparently.
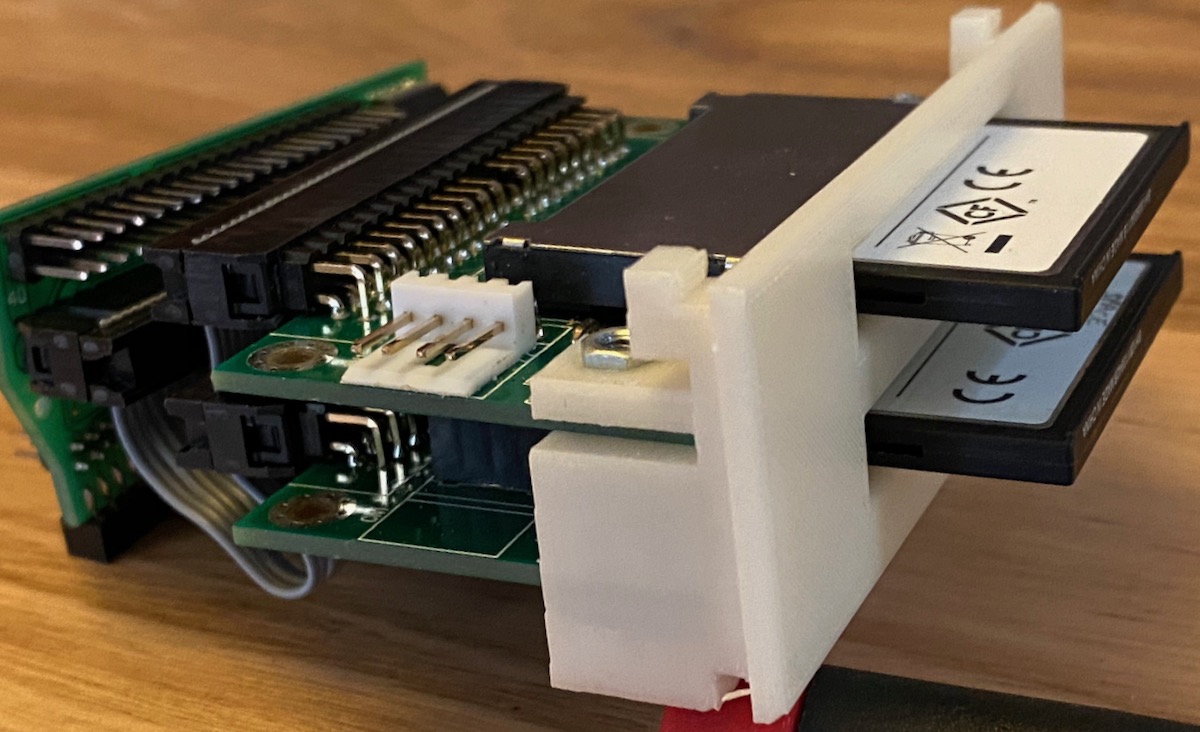
Two CF card slots
I’m not a big fan of cutting holes in a case to fit extras. However there was already a hole in this one, looks like someone had made space for a ribbon cable to exit to an external drive. So enlarging it to make a place for two CF card readers to sit seemed reasonable. The only good CF card readers I found on eBay were intended to mount in a PC case but are no bigger than the others once the backplane metal is removed. To make a nice compact unit I removed jumpers and soldered one as master, one as slave, then stacked them running the power pins through both to power both from one cable. Unlike many eBay CF adapters these work correctly with the system drive activity LED. A 3D-printed assembly holds them both nicely in place.

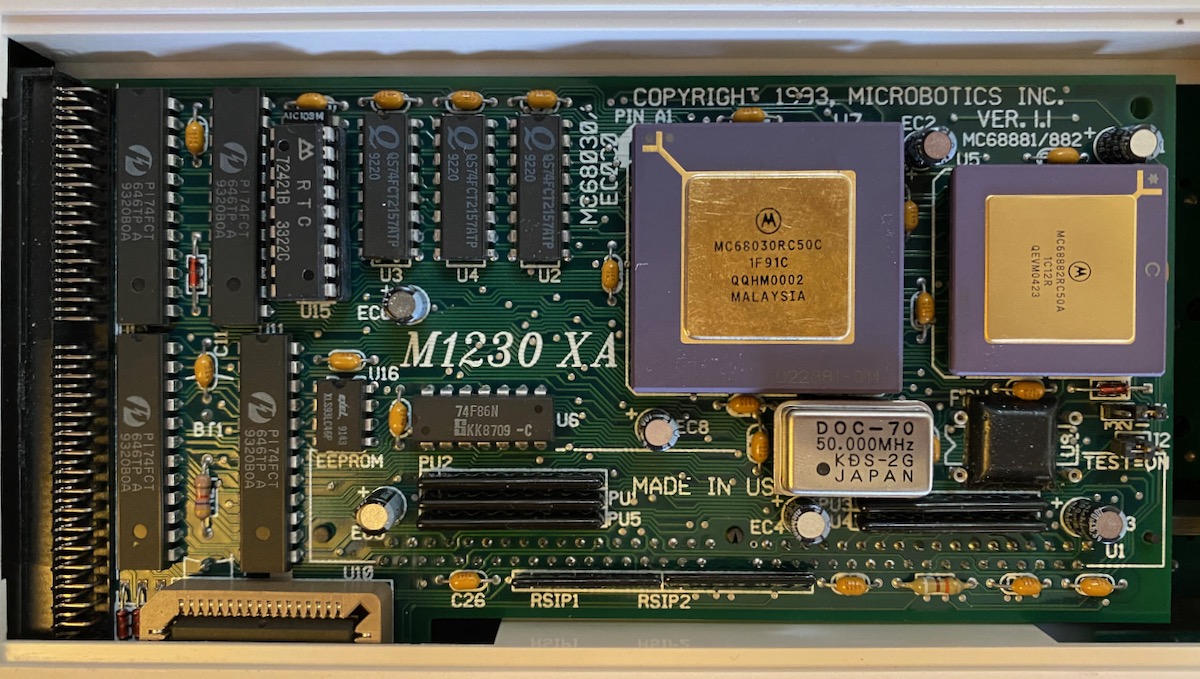
Microbotics MX1230A
The accelerator came with the Amiga, but was 33MHz. After replacing all of the capacitors on the card I obtained a 50MHz CPU, FPU and crystal, also a 5V 32x32 128M SIMM to max it out. The SIMM is recognised as 64M only - my theory is that this is related to Workbench version since the card looks to be in top condition, no chance of an address circuit being out. I would like to check it but I have no schematic for the card and no time to see if this actually works as 128M under the Workbench current at the time of this card's release. The included SetXA/AutoXA programs tell me there is no Microbotics card installed but the MMULib software from aminet installs fine; no issues accessing 68030 instructions, WHDLoad can access the 64M of memory. 64M is plenty of memory for what I need though it would be better to see all of it of course. There are 68040 and 68060 options available but when I had an Amiga many years ago 68030 is what I wanted, so that’s what I have.
Optical Drive
Nah, there’s no optical drive, it’s 2020!
What’s Next?
Maybe if Individual Computers release a 68060 I will think about it, the Indivision is such a quality item and their preview of the heatsink for the upcoming card looks amazing. Not only that it is supposed to dramatically improve IDE speeds. Certainly I have to build a joystick, I have a Sanwa arcade stick ready to go into a case (WICO Command until then). But the 20+ GB of Amiga software I have waiting for attention will certainly take up some time...