Compact Macintosh video - 4
At the beginning it seemed obvious that a FPGA was the only way to convert a VGA-like digital video stream to a TMDS output video stream. Experimenting with Xilinx Arty and Intel Max-10 boards showed that they could certainly get the job done. But for an amateur the sheer size and routing requirements of these packages is daunting. Still, I got started and was almost ready to think about putting together a PCB order when I got busy with other things. Getting back to the project I took a look at price and availability before starting a PCB, which pretty much killed the idea. Supply chain problems have hit FPGA as hard as any other kind of component, and for any vital part in a project I would like to see hundreds in stock at a reasonable price. Not so with the FPGAs.
Time passed. I received my first Raspberry Pi Pico. Didn't do much with it at first. Then recently I saw Luke Wren's repo driving not-HDMI with a Pico!. (Can't call it HDMI, for licensing reasons). Anyway, underneath is a signalling protocol called TMDS. TMDS is required to drive the LCD panel I want to use in the Mac. The Pico can produce a TMDS output stream capable of driving a higher resolution than I need and in fact can drive two screens. Could this $4 board replace the unobtainable and complicated $15 FPGA?
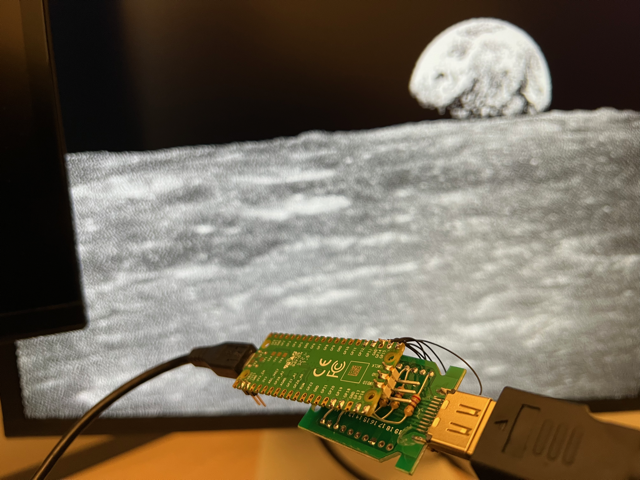
I tried it myself, with ugly connections via leaded 1/4W resistors - success!
What makes this work is the Programmed I/O feature of the Raspberry Pi Pico. It is a pair of simple processors each containing four state machines that run independently of the Pico's pair of ARM cores. These state machines have a tiny set of 9 instructions where every instruction takes one cycle and can achieve multiple actions - reading the state of a pin while setting the state of another for example. Very powerful! What is PIO?
Programming for the Pico is not difficult to set up. You have C/C++ or Python environments to choose from. Python is fine if doing things that aren't pushing the capabilities of the Pico to its fullest, it's great for learning, but I'll be using C.
I have a Mac, Windows and Linux platforms available so tried them all. The Mac installation stalled at the OpenOCD stage. I never really intended to use the Mac, so moved on. The Windows installation proceeded like any Windows installation these days - take the instructions for other platforms, but add this special driver tool and add this special programmer shell, and a bunch of other stuff to make Windows work more like Linux. Which begs the question "why not just use Linux"?
So I tried installing Ubuntu on a recent Lenovo P1, a fairly powerful laptop with NVidia A2000 RTX GPU. With this GPU I expected a lot of problems and was not amazed to have to give special permission to let drivers that were not 100% ideologically pure into the install. But everything worked, right down to support for sound and the big screen and external accessories via Thunderbolt hub. And it's generally a pretty great environment. If I could get all the software on Linux that I keep Windows around for I would probably never boot Windows again. Like in macOS, the tools a developer relies on are native, not hacked onto something essentially different. Linux has really come a long way since I first installed it from floppy.
Pico installation is not hard but it is software, so things break. I found two main problems. The first was that the shell script supplied by Raspberry Pi to get all the C environment set up contained a repo that referred to submodules hosted at a defunct repo in .cz. That is now fixed, I fixed it locally by editing .gitmodules and finding those packages elsewhere. The other problem is that gdb-multiarch would not connect to the Pico via OpenOCD. I read that it was a known bug in the version included in Ubuntu 22.04 so I got a later version of gdb-multiarch (12.1) and now all is well.
Loading software to the Pico is made easy by the built-in UF2 loader. If you hold down the button on the Pico while connecting via USB it mounts as a filesystem. The .uf2 binary can be copied to the Pico causing it to reboot and begin running that code. So easy! But it's a slow process and eventually a SMD USB micro socket will break off. The best way to do this is to get another Pico and dedicate it to being a SWD probe and that makes loading software instant, and allows debugging via SWD too. Very nice. I made a quick housing for a Pico that will be dedicated to picoprobe duties.
(I did also try out the Segger IDE under Windows with my Segger J-Link mini edu and liked the way that it connects to the Pi via SWD allowing instant software load and debug. But then I couldn't see that it offers anything more than the vscode/gcc setup. Maybe I have not tried to do anything very sophisticated yet. It's great that Segger lets individuals use this software for free but it would be nice if it didn't show nag screems quite so often. I'll try it out again in Linux perhaps.)
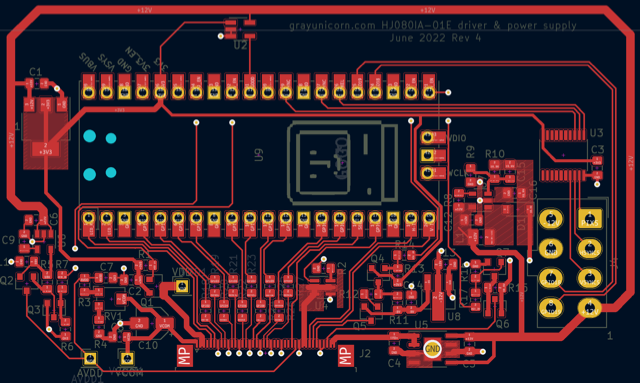
With the Pico able to output TMDS, requiring 8 GPIO pins, and three (hsync, vsync and pixel) GPIOs dedicated to input, that leaves enough to use two for the rotary encoder that is the brightness control, and enough to control every other aspect of the LCD including enabling voltages in the sequence shown in the datasheet. I'm thinking that the Pico will start up, enabling the LCD voltage supplies in the sequence the datasheet requires. Then it will begin a PIO process to read Macintosh video, storing that in a frame buffer owned by one of the ARM cores. The PIO process that outputs to the LCD will read from that frame buffer. As it won't have much to do while the video conversion process is going on the Pico core will be free to detect interrupts from the rotary encoder and alter the duty cycle of the LCD backlight PWM output - a brightness control. The LCD driver board incorporating the Pico is designed to sit on the back of the LCD so that the ribbon cable connects into the socket. It looks like this:
When it comes back from manufacturing it will be time to get it built and then get onto the business of writing the software.

