Compact Macintosh video - 3
A 3D printed mount for the display
The screen arrived and I wasted no time in plugging it in and trying it out. At this point I had already done some FPGA work - in fact completed an entire Coursera specialization, over four months - but more on that later. Suffice to say I had the Mac's video working at pixel-doubled XGA resolution with one of my FPGA development boards and was able to connect the LCD panel through the VGA connector on the supplied converter board.
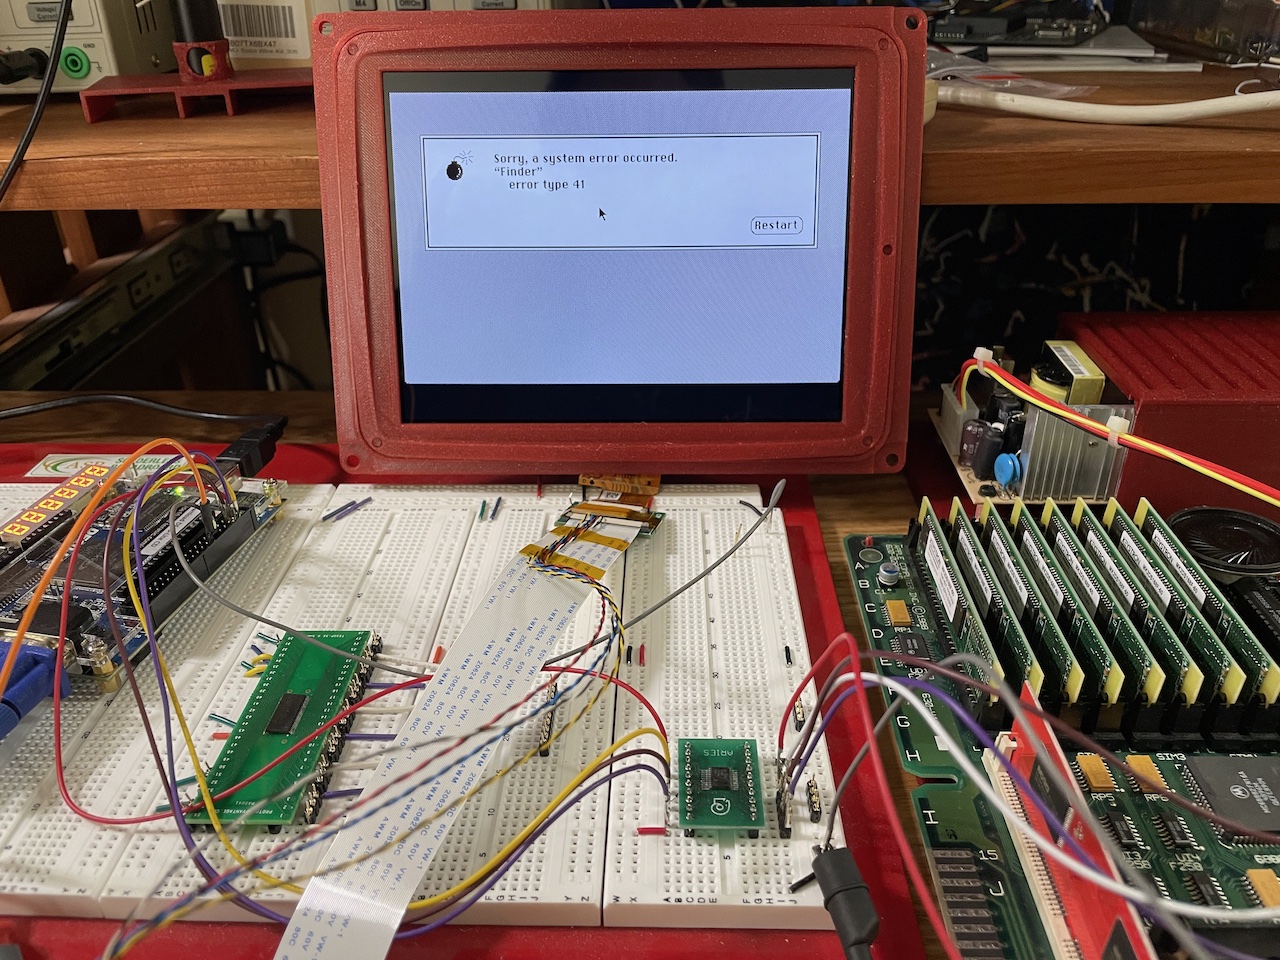
That's actually not a bad image. Compared to the CRT it is super sharp! Of course it could be slightly bigger, but as I said in the last post it's time to move forward, replacing the screen later won't be too hard if it is affordable.
3D modeling is something I've been doing since I needed to make the keyboard mounting rails for the Amiga 1200. When I started I used Fusion 360 and it's reasonably good. I always found the Autodesk web site incredibly dense and corporate and very hard to find out what you are actually allowed to do. My reading was that the license for hobbyists like myself was free as long as I wasn't making $100k annually - no risk of that. Then they changed it so that there is no such license. Now it's still free for hobbyists but there can be something like 8 "active" designs at any one time. Another thing about Fusion360 is that it is cloud-based. You might have the fastest CPU(s) that can be bought but Fusion360 will keep you waiting while your design goes up to the cloud, gets procesed and (eventually) you get an STL that you can print. Seriously it is slow, many minutes to generate a simple STL sometimes.
When Shapr3D came along for the iPad I really wanted to like it. I still have an active subscription but there are some things it just can't do. One big thing is there's no timeline. Undo works but you can't roll back features along a timeline like a professional package can. When iOS software became available on Mac desktop I tried again for a bit but it just isn't for me. Unless this changes pretty quickly I don't think I am going to subscribe again.
A few years ago a friend had me do some design in Solidworks, using a legitimate license. I loved it and I always wanted to be using Solidworks again. I looked at the license options (website density approximately equal to AutoDesk) and found that student licenses were free, there were startup options with discounts but nothing for me. Then I found the Experimental Aircraft Association! Members get to use a student version of Solidworks! Of course I joined immediately.
(I love aircraft too - and if I don't make use of one of their member discounts for some flight control gear I might just print my own, having designed it with Solidworks. And having some FPGA experience I don't think I'll be using an Arduino to make it work. Rotary encoders would be ideal...)
Having forgotten a lot of what I learned about Solidworks I followed the directions provided by the EAA to Tim Callinan's YouTube channel - his playlist on Solidworks is fantastic. There's a lot of other good content there too. Buy Tim a beer through his donation link (I did).
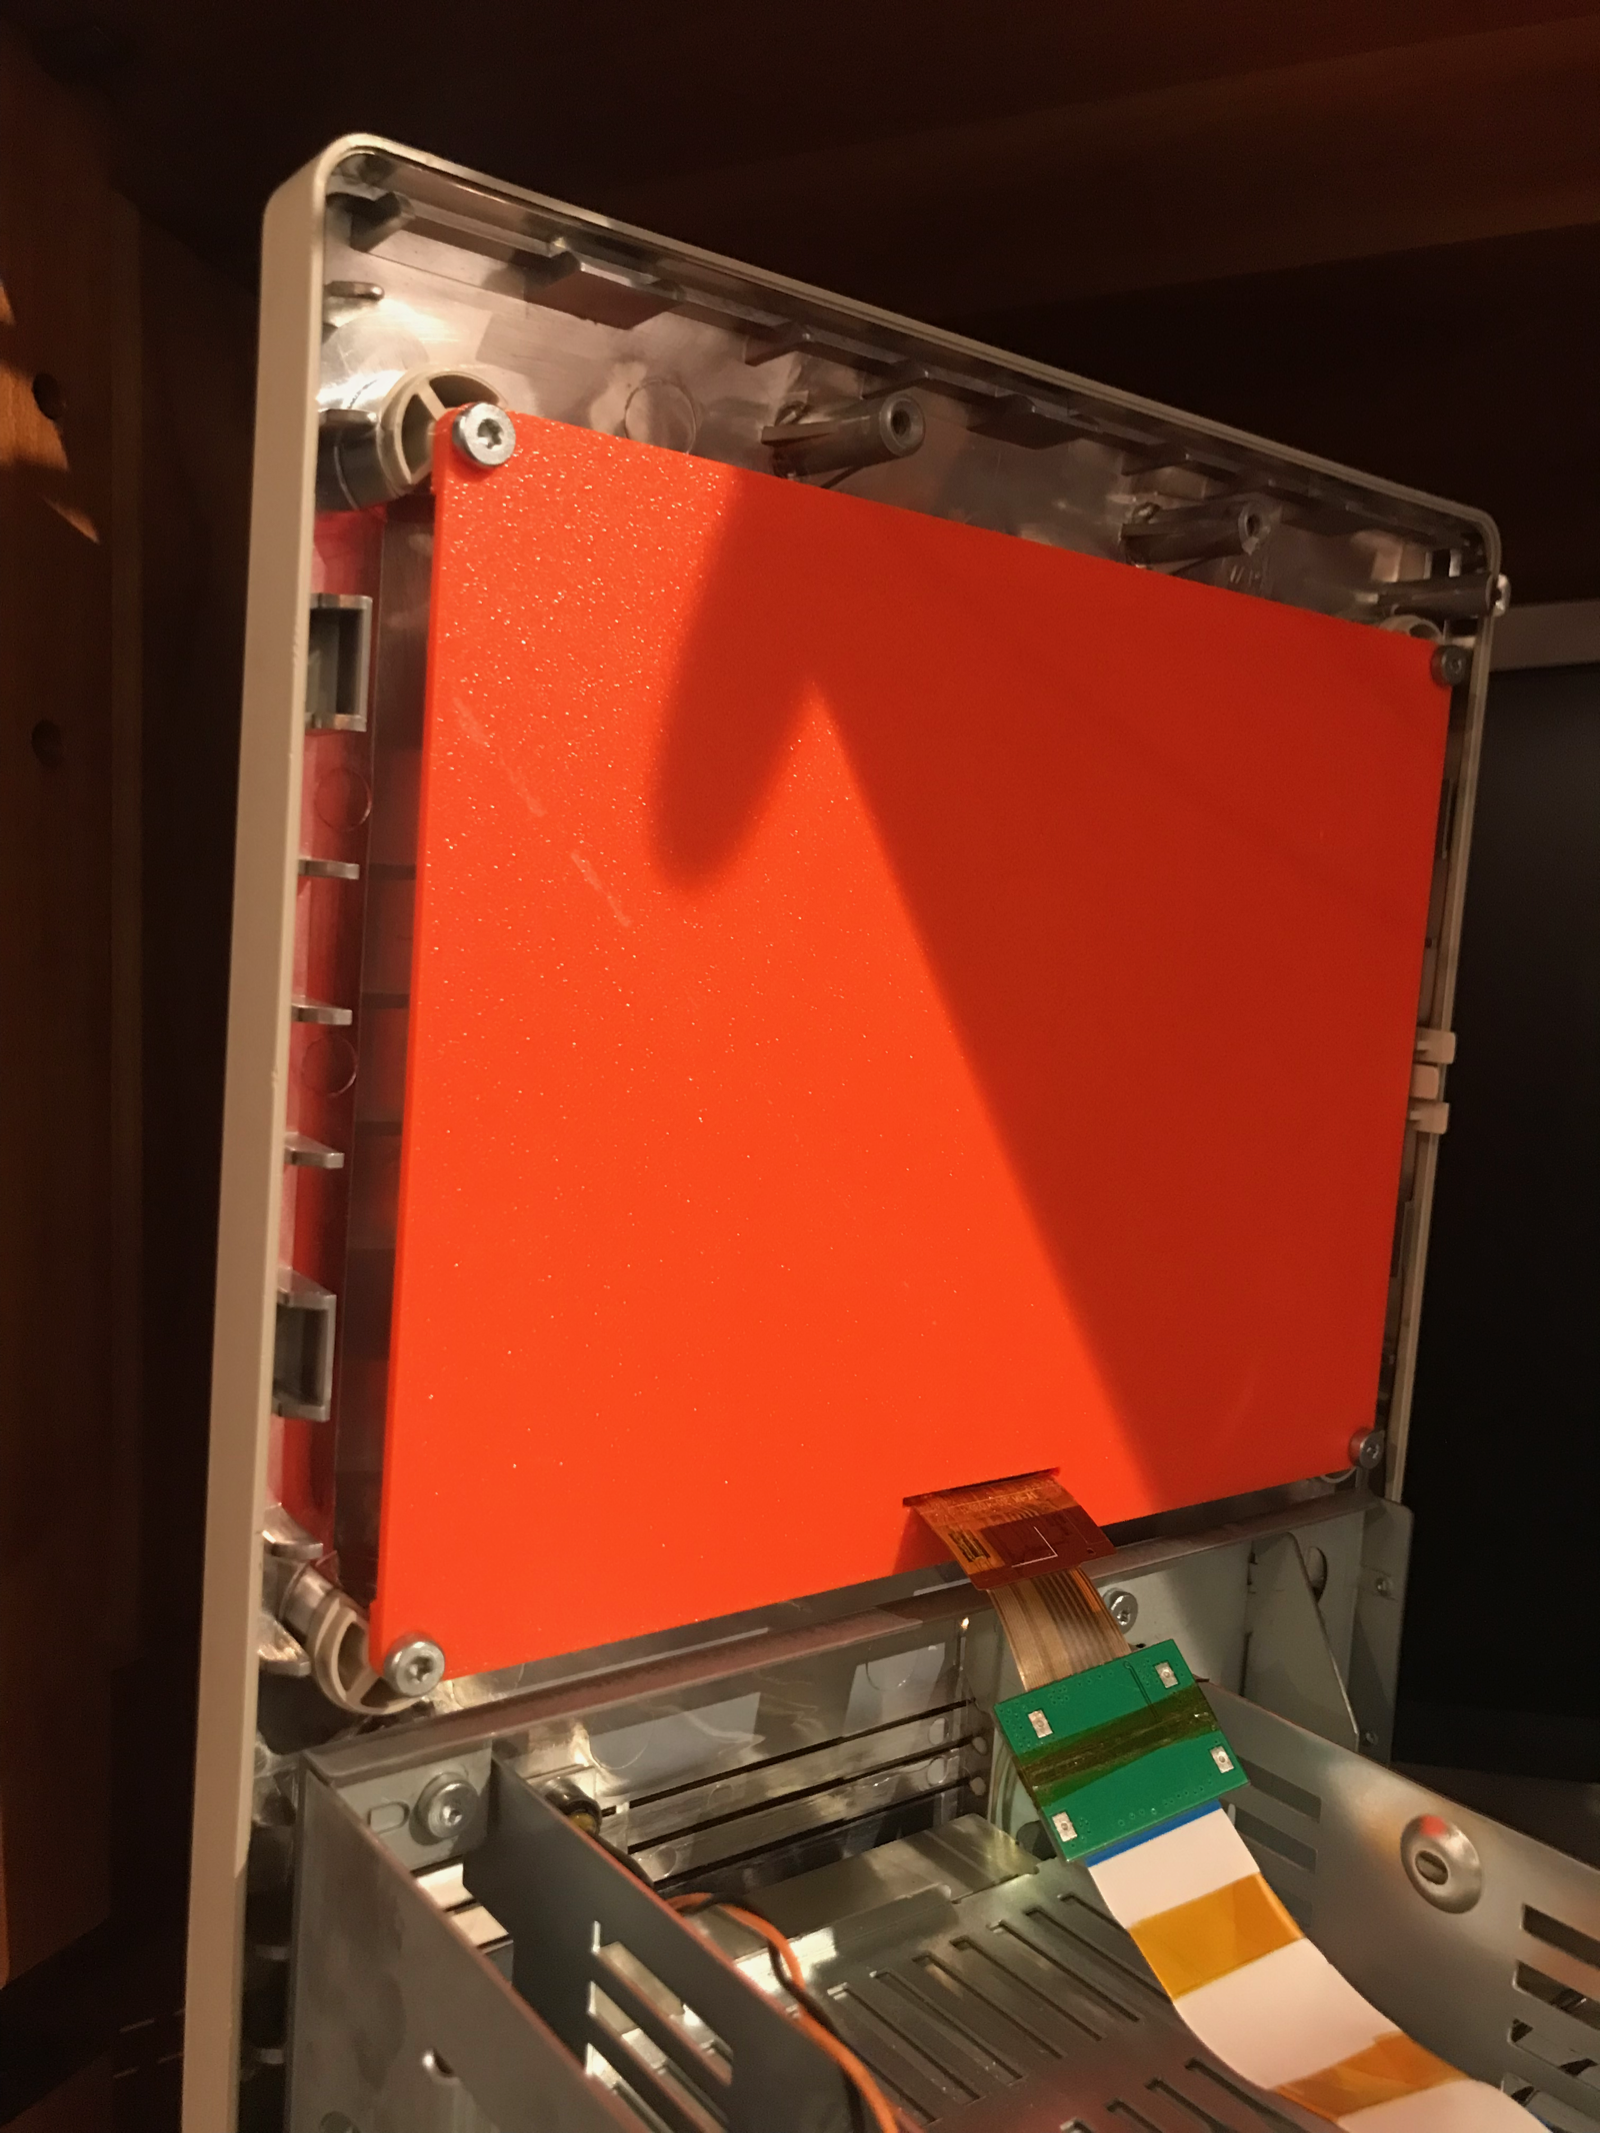
Solidworks knowledge refreshed and all sketches fully-defined, I designed the display mount for the Macintosh. Basically I made a solid rougly the 2D outline of the CRT front. I made a curved sketch on one axis and then a curved path on the orthogonal axis. The extruded loft of the first curve follows the second curve with the result being a shape that is just like the curved front of a glass CRT, so it fits into the curved front of the Mac nicely. With that done it was a matter of adding mounting lugs, and cutting out the window of the Macintosh from the front.
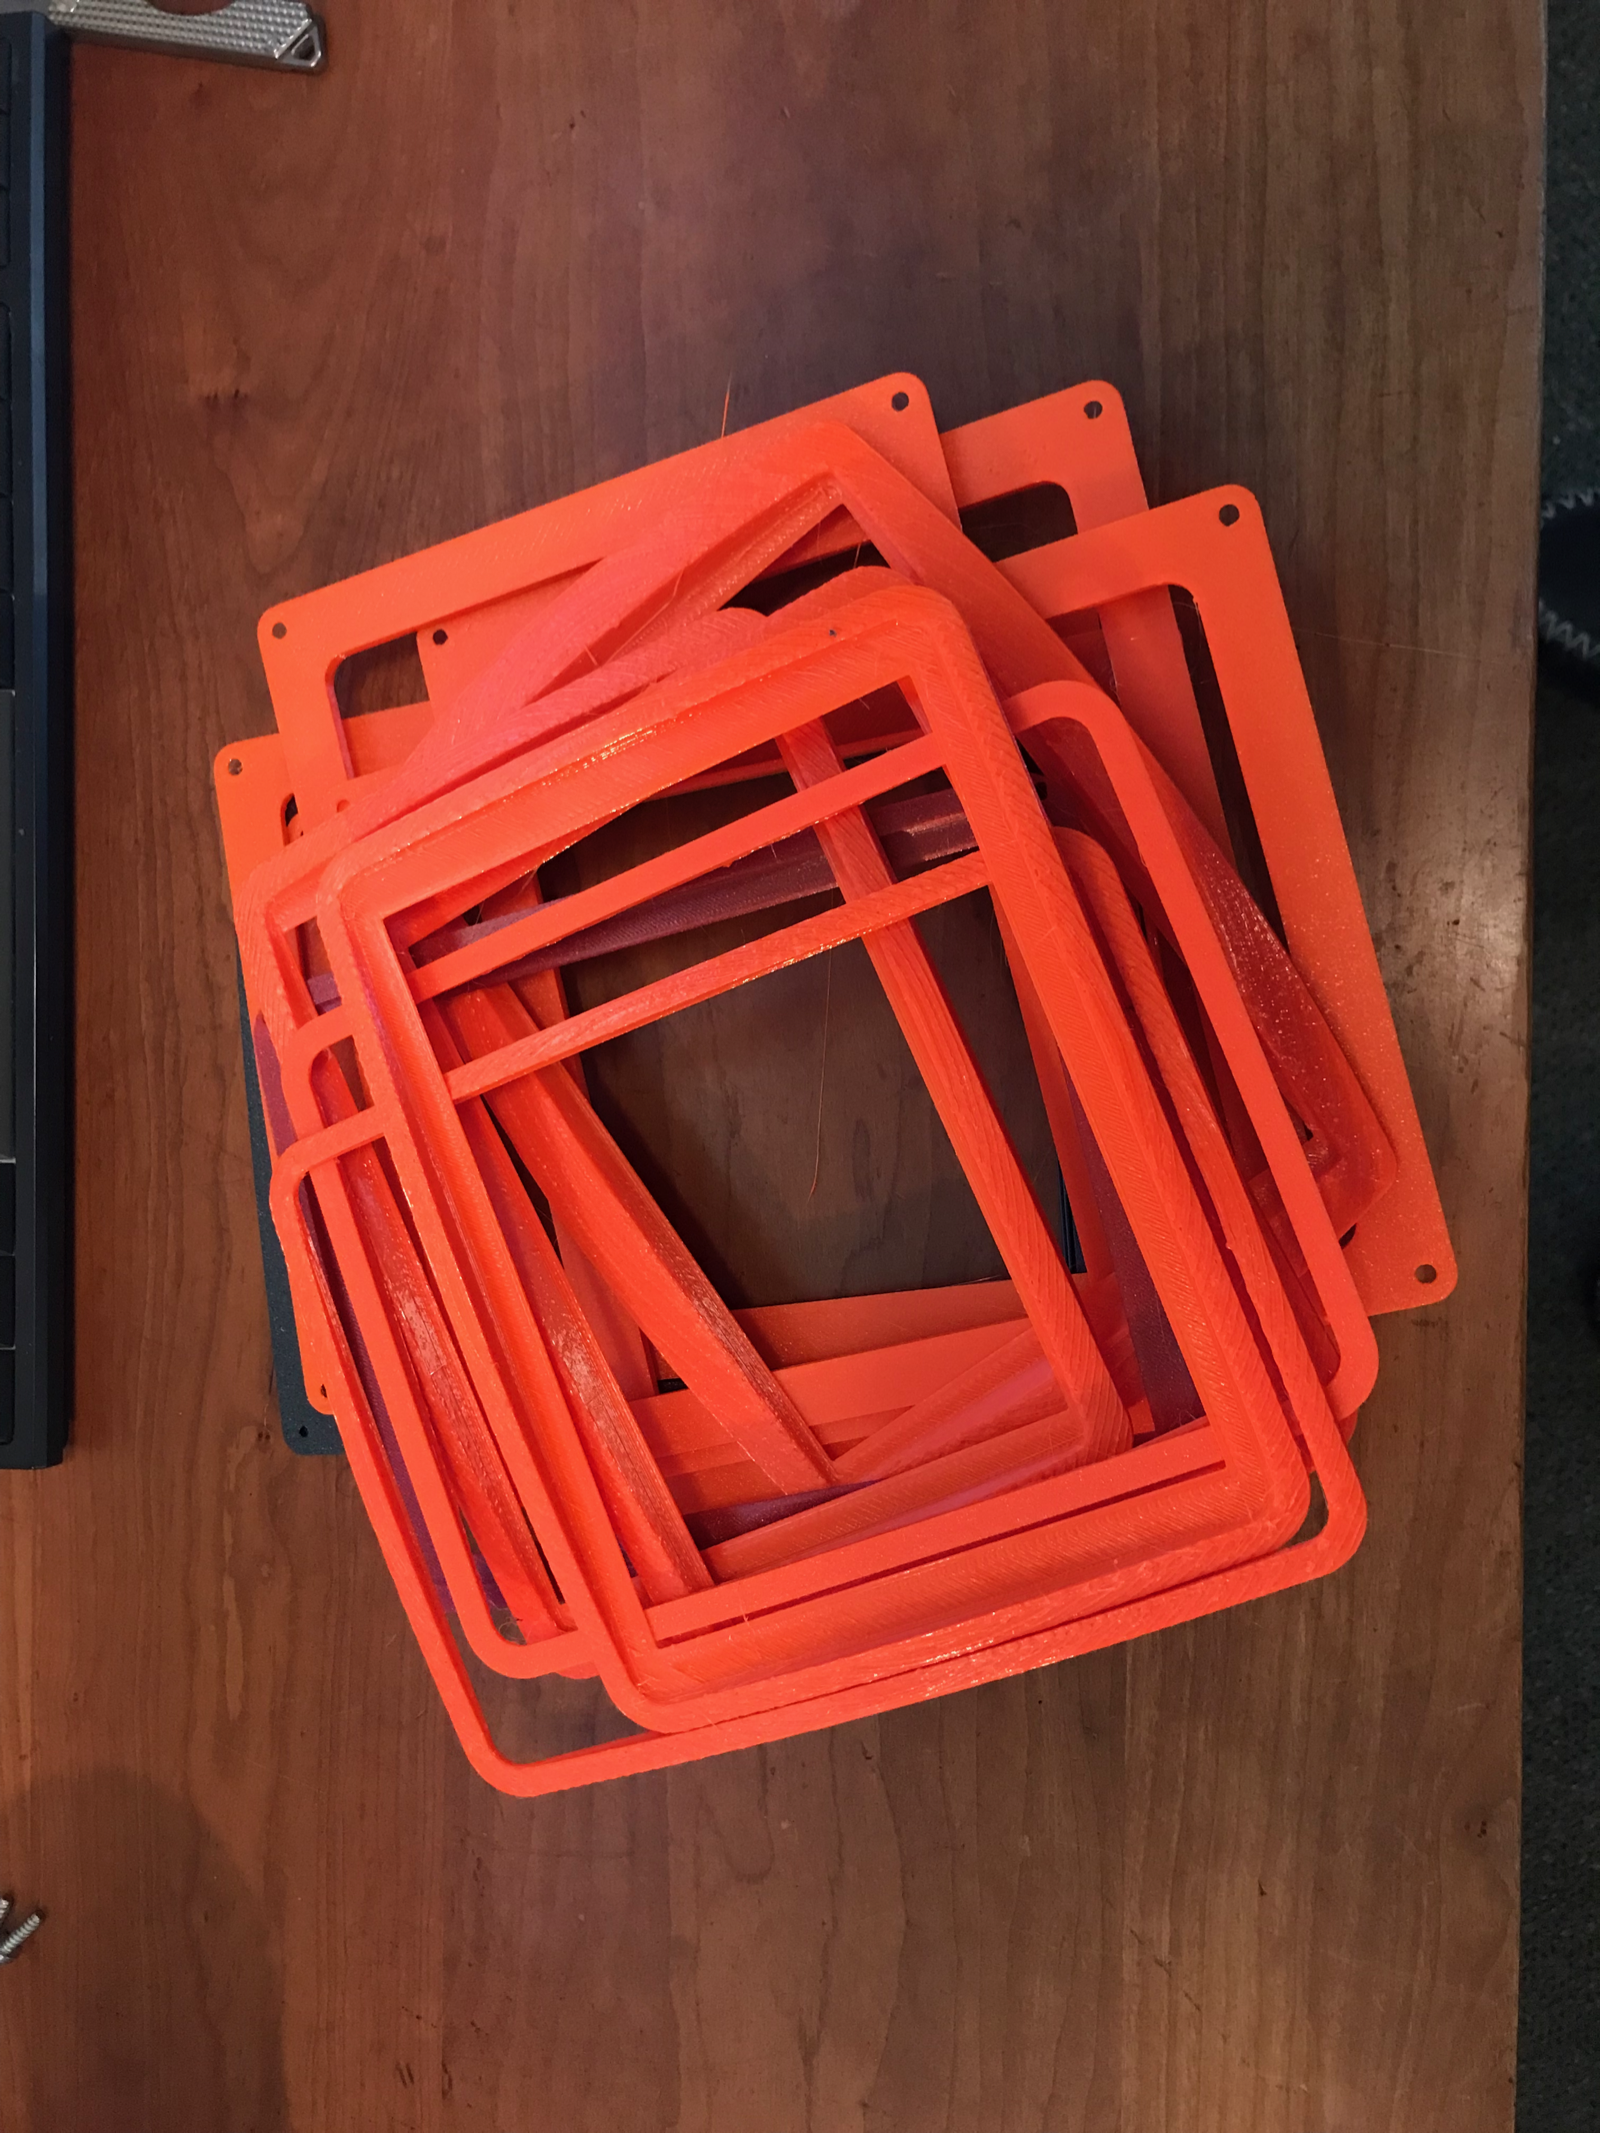
If you design an object without considering how it will print you can find you need supports, then you waste plastic printing those, you have to spend a lot of time cleaning up the print and getting rid of the supports. Purely mechanical objects can often be designed so that they need no supports. Partly for that reason I made the mount in two parts, both printing flat and with no supports. The first part is basically a frame that mates up to the Mac bezel from the inside with the two-axis curve and allows the visible part (but not the metal surround) of the display to be seen. I printed white first, but black looks better.
The other half contains a recess that fits the body of the LCD display so that when the frame is sandwiched against it everything is help in place. There is a raised ridge that the frame fits into so that everything is snugly held in position. Given that the four Torx bolts were designed to hold a relatively very heavy CRT I think this is going to be a very secure mount. I printed this in Prusa Orange, you can't see it when the Mac case is closed anyway.
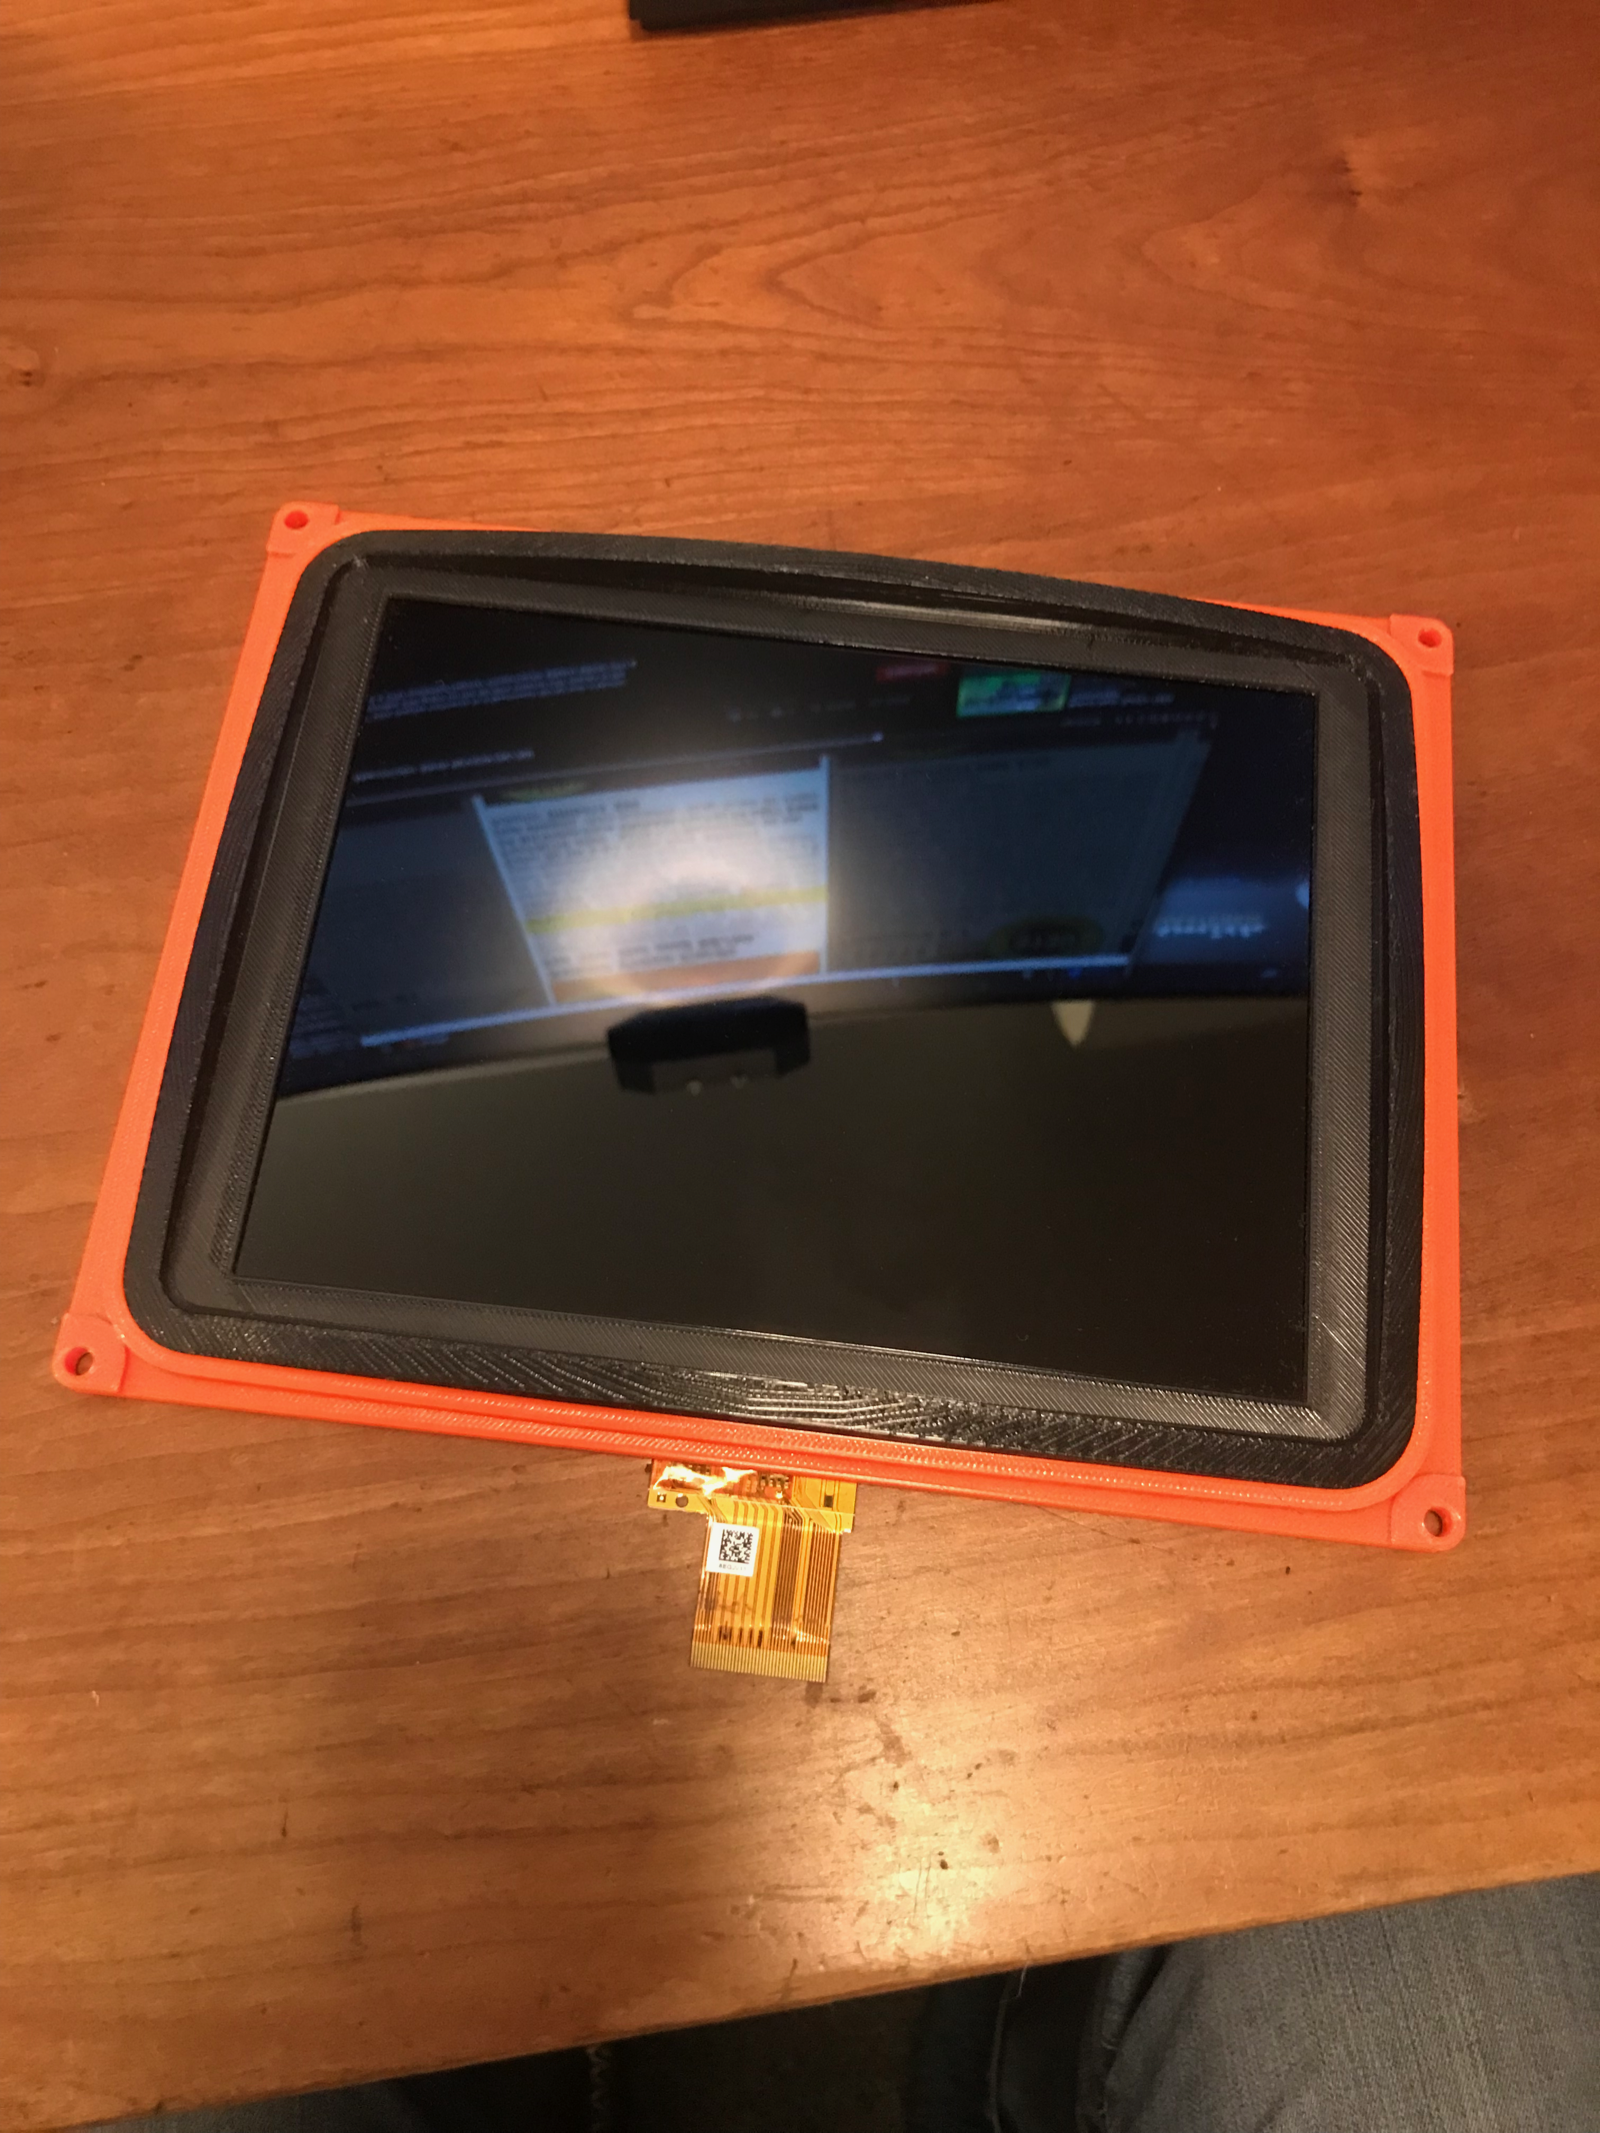
At the back of this assembly a slot allows the LCD display's ribbon cable to poke through ready to connect to a circuit board. When I design that PCB I will be able to locate the FFC connector in exactly the right place. I'd better get on with designing that board.
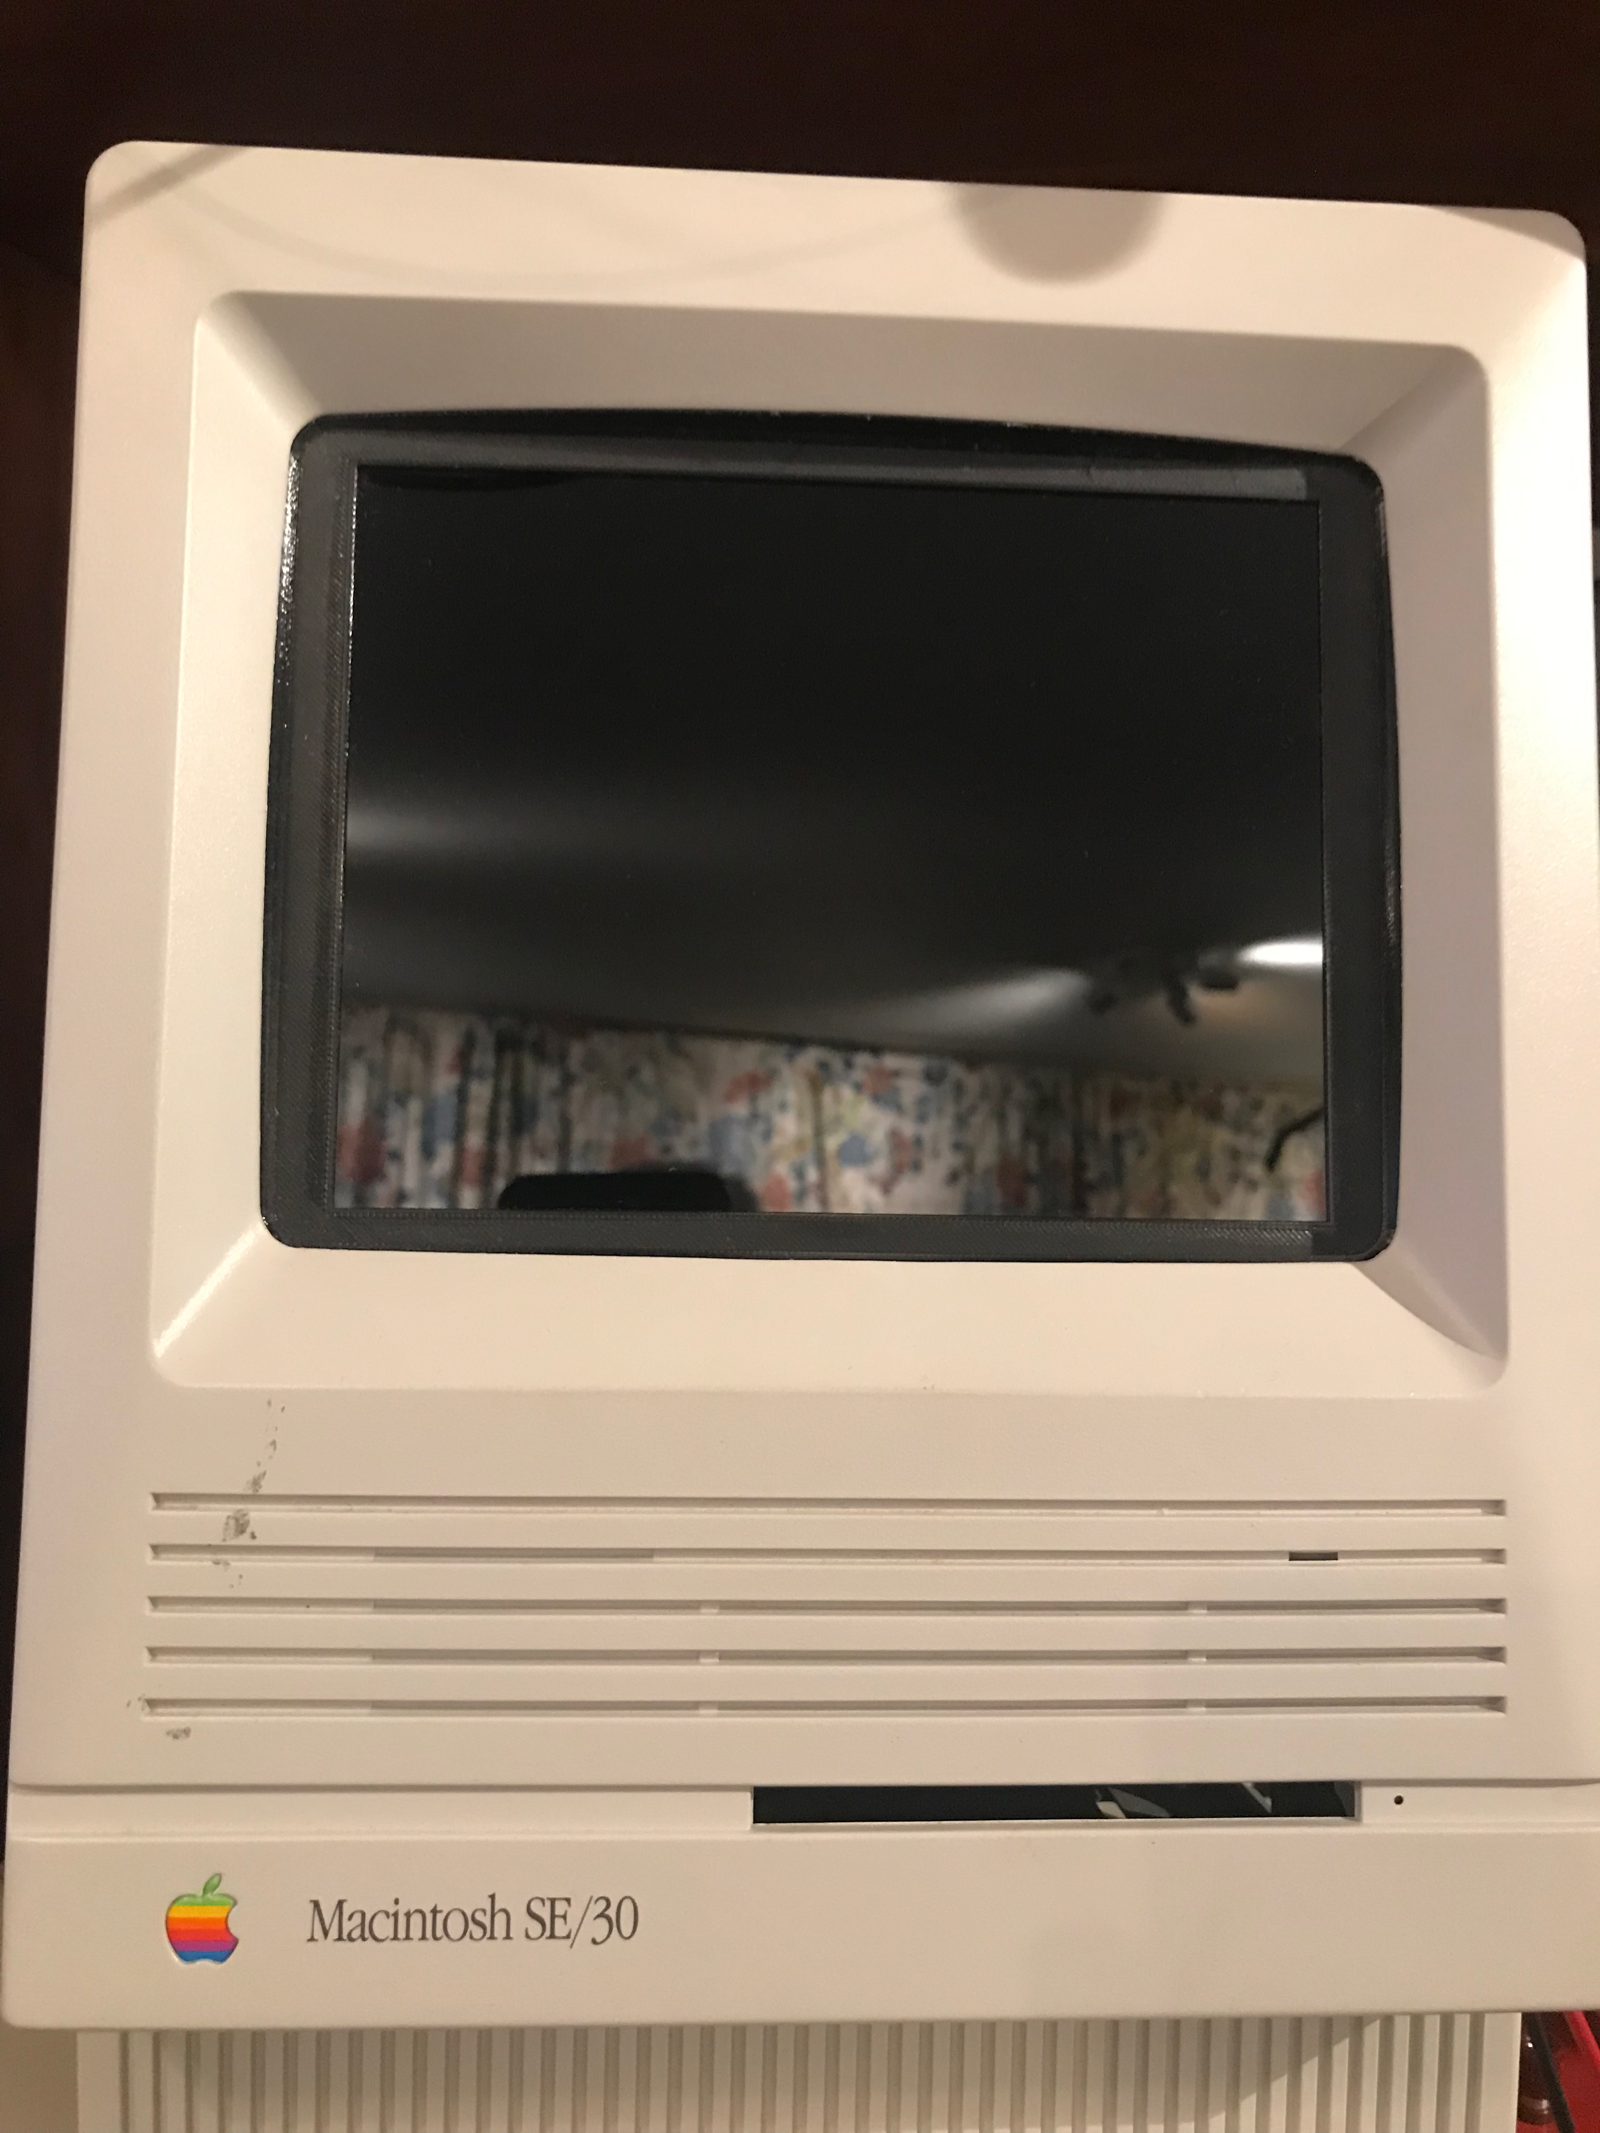
And the front looks like this. And now the hard part, making an image appear on that screen.
(This got finally edited and posted after Solidworks changed to the useless cloud-based "maker" license, after I posted in disgust about how bad Solidworks had become, after I started a B.Eng at RMIT. When you're a student you get access to some great software including all of Solidworks again. As I already have a degree in CS I'm finding the programming parts of this new degree incredibly basic, but the mathematics is challenging. And I forgot how much fun group assignments aren't.)